Ultimate School Pizza Recipe- Easy Delicious Fun
The Ultimate School Pizza isn’t just a meal; it’s a nostalgic journey back to carefree days, to lunchboxes packed with dreams and the unmistakable aroma of pure joy. We all remember it, don’t we? That perfectly balanced, wonderfully cheesy, and incredibly satisfying pizza that was the undisputed cbeef hampion of the cafeteria. It’s the kind of dish that sparks instant smiles, conjures up memories of playground games, and never fails to hit the spot, no matter your age. What makes this Ultimate School Pizza so special? It’s the simple, honest ingredients, the slightly crisp yet delightfully chewy crust, and that golden, bubbling cheese topping that’s just beggin extractg to be pulled into glorious strings. It’s the taste of comfort, of childhood, and of pure, unadulterated deliciousness. Prepare yourself to rediscover that magic, because we’re about to bring the Ultimate School Pizza right into your kitchen.
Get Ready to Relive Your Favorite Lunch Moment
The Ultimate School Pizza, Reimagin extracted
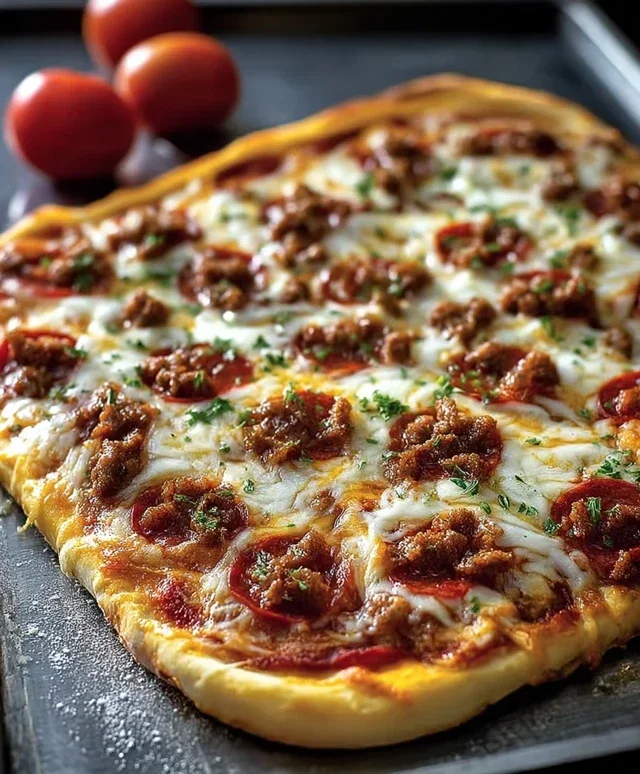
The Ultimate School Pizza
There’s something undeniably nostalgic and comforting about school pizza. It’s the smell of slightly sweet dough baking, the perfectly melted cheese, and the savory, simple toppings that transport us back to cafeteria lunches and hurried breaks. But what if you could recreate that perfect, childhood-favorite pizza at home, elevated with a touch of homemade goodness? This recipe for “The Ultimate School Pizza” is designed to do just that. We’re going to capture that classic, slightly chewy crust, a rich and flavorful sauce, and a generous layer of melty cheese. Get ready to impress yourself and anyone lucky enough to share a slice.
Ingredients:
Cooking Instructions:
Let’s get started on building this pizza from the ground up. The crust is the foundation of any great pizza, and we’re aiming for that perfect balance of soft and slightly chewy, just like the good old days.
Making the Dough
1. In a large mixing bowl, combine the all-purpose flour, powdered milk, sugar, quick-rise yeast, and salt. Whisk these dry ingredients together until they are well incorporated. The powdered milk is a secret weapon here; it adds a subtle richness and helps create a softer crust texture that’s reminiscent of school pizza. The sugar acts as food for the yeast and also contributes to that classic slightly sweet flavor.
2. Add the warm water (make sure it’s between 110-115°F – too hot will kill the yeast, too cool and it won’t activate properly) and the vegetable oil to the dry ingredients. Stir with a wooden spoon or a sturdy spatula until a shaggy dough begin extracts to form. Once it’s too difficult to stir, turn the dough out onto a lightly floured surface.
3. Knead the dough for about 5-7 minutes. This is where the gluten develops, giving your crust its structure. Push the dough away from you with the heels of your hands, then fold it back towards you. Rotate the dough and repeat. It will be sticky at first, but as you knead, it will become smooth, elastic, and less sticky. If it’s too wet, add a tablespoon of flour at a time; if it’s too dry, add a teaspoon of water. Once you have a smooth, elastic ball of dough, place it in a lightly oiled bowl, turning to coat all sides. Cover the bowl with plastic wrap or a damp kitchen towel and let it rise in a warm place for about 30-60 minutes, or until it has doubled in size.
Crafting the Sauce and Meat Topping
4. While the dough is rising, let’s prepare the toppings. In a large skillet over medium heat, cook the crum extractbled Italian sausage and ground chuck until browned. Break up any large clumps with your spoon. Drain off most of the grease, leaving just a little for flavor. Add the ½ teaspoon of salt and ½ teaspoon of black pepper to the meat. Remove the cooked meat from the skillet and set it aside on a plate lined with paper towels to drain further.
5. In the same skillet (no need to wipe it clean – those flavorful bits are gold!), add the olive oil and minced garlic. Sauté the garlic for about 30 seconds until fragrant, being careful not to burn it. Pour in the 6-ounce can of tomato paste and stir it into the garlic and oil. Cook for about 1-2 minutes, stirring constantly. This step helps to deepen the flavor of the tomato paste. Gradually whisk in the 1½ cups of water until the sauce is smooth. Bring the sauce to a simmer, then reduce the heat to low. You can add optional dried oregano, dried basil, or a pinch of red pepper flakes at this stage if you like a little extra flavor complexity. Let the sauce simmer gently for about 10-15 minutes, stirring occasionally, until it has thickened slightly. Taste and adjust seasoning if needed.
Assembling and Baking Your Masterpiece
6. Once the dough has doubled in size, punch it down gently. Lightly flour a clean surface and your hands. You can either divide the dough into two balls for two medium pizzas or use the whole amount for one large, thick-crust pizza. Gently stretch or roll the dough into your desired pizza shape. I like to create a slightly raised edge for the crust. Place the shaped dough onto a pizza peel that has been dusted with cornmeal or flour, or directly onto a baking sheet lined with parchment paper.
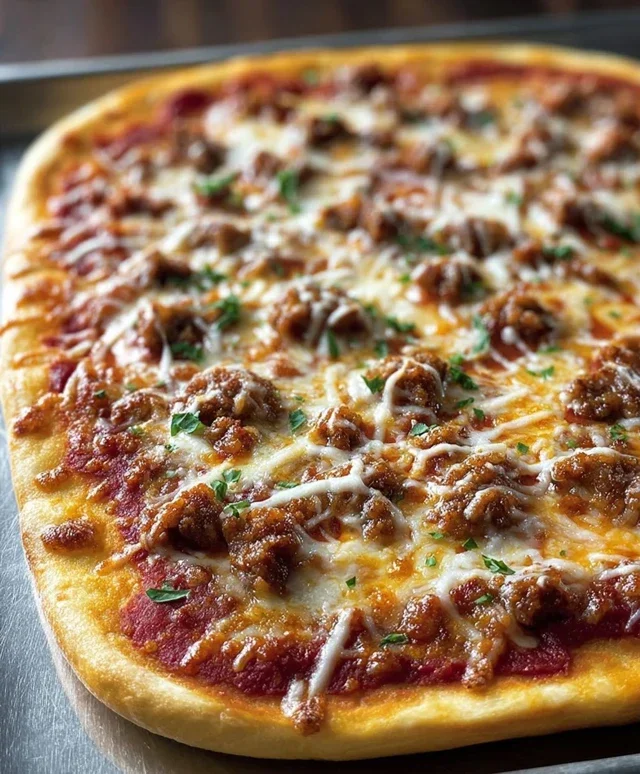
7. Spread a generous layer of your homemade sauce over the pizza dough, leaving a border for the crust. Then, evenly distribute the cooked meat mixture over the sauce. Finally, sprinkle liberally with your shredded mozzarella cheese. Don’t be shy with the cheese – it’s a key component of that irresistible school pizza experience!
8. Preheat your oven to 450°F (230°C). If you’re using a pizza stone or steel, place it in the oven while it preheats. Carefully slide the pizza onto the preheated stone or steel, or place the baking sheet in the oven. Bake for 12-18 minutes, or until the crust is golden brown and the cheese is bubbly and slightly golden. The exact baking time will depend on your oven and the thickness of your crust.
9. Let the pizza cool for a few minutes before slicing. This allows the cheese to set slightly and prevents everything from sliding off. Serve hot and enjoy your ultimate school pizza! It’s a taste of nostalgia with a homemade touch that’s sure to be a hit.
Conclusion:
So there you have it – the ultimate guide to creating a truly spectacular school pizza that’s far beyond the cafeteria standard! We’ve covered everything from crafting the perfect chewy crust to layering on flavorful toppings that even the pickiest eaters will adore. This recipe isn’t just about making pizza; it’s about bringin extractg a little bit of joy and deliciousness to lunchtime. It’s simple enough for busy weeknights but impressive enough for a special treat. I encourage you to give this ultimate school pizza a try and see for yourself how easy and rewarding it is to make pizza from scratch that your whole family will love. Don’t be afraid to get creative with your toppings!
This pizza is incredibly versatile. Serve it hot for a satisfying lunch or dinner, or let it cool and pack slices for a delightful on-the-go meal. It pairs wonderfully with a simple side salad, some carrot sticks, or even just a glass of milk.
Frequently Asked Questions:
Can I make the pizza dough ahead of time?
Absolutely! You can prepare the pizza dough up to 2 days in advance. Store it in an airtight container in the refrigerator. When you’re ready to use it, let it come to room temperature for about 30-60 minutes before shaping and topping.
What are some easy variations for picky eaters?
For picky eaters, keeping it simple is key. A classic Margherita with just sauce, mozzarella, and a sprinkle of basil is always a hit. You can also try a plain cheese pizza or a ‘build-your-own’ station where they can choose their own toppings. Removing any vegetables they dislike is also a great strategy.
How can I store leftover school pizza?
Leftover pizza can be stored in an airtight container or wrapped tightly in plastic wrap in the refrigerator for up to 3 days. Reheat slices in a toaster oven or a regular oven for the best texture, or enjoy them cold!
The Ultimate School Pizza
A hearty and flavorful pizza reminiscent of classic school cafeteria favorites, featuring a robust meat sauce and a chewy crust.
Ingredients
-
2⅔ cups all-purpose flour
-
¾ cup powdered milk
-
2 tablespoons sugar
-
1 packet quick-rise yeast
-
1 teaspoon salt
-
1⅔ cups warm water (110-115°F)
-
2 tablespoons vegetable oil
-
½ pound ground chuck (beef)
-
½ teaspoon black pepper
-
½ teaspoon salt
-
6 ounce can tomato paste
-
1½ cups water
-
⅓ cup olive oil
-
2 cloves garlic, minced
Instructions
-
Step 1
For the dough: In a large bowl, whisk together flour, powdered milk, sugar, yeast, and salt. Gradually add warm water and vegetable oil, mixing until a shaggy dough forms. Knead on a floured surface for 8-10 minutes until smooth and elastic. Place in a greased bowl, cover, and let rise in a warm place for 30 minutes. -
Step 2
For the sauce: While the dough rises, heat olive oil in a large skillet over medium heat. Add minced garlic and cook until fragrant, about 1 minute. Add ground chuck, breaking it up with a spoon, and cook until browned. Drain off any excess fat. -
Step 3
Stir in tomato paste, 1½ cups water, black pepper, and ½ teaspoon salt. Bring to a simmer, then reduce heat and cook, uncovered, for 15-20 minutes, stirring occasionally, until thickened. -
Step 4
Preheat oven to 450°F (230°C). Punch down the risen dough and stretch or roll it out onto a greased pizza pan or baking sheet to your desired thickness. -
Step 5
Spread the meat sauce evenly over the pizza dough, leaving a small border for the crust. Add your favorite cheese (not included in ingredients). -
Step 6
Bake for 15-20 minutes, or until the crust is golden brown and the cheese is bubbly and melted.
Important Information
Nutrition Facts (Per Serving)
It is important to consider this information as approximate and not to use it as definitive health advice.
Allergy Information
Please check ingredients for potential allergens and consult a health professional if in doubt.