Easy Homemade Mayo Recipe – Worth The Effort
Making mayo from scratch is easy and totally worth it, and honestly, it’s a game-changer in my kitchen. Forget those jars from the grocery store; there’s a creamy, dreamy, homemade magic you’re missing out on. You know that irresistible richness and subtle tang that elevates everything from a humble BLT to a fancy potato salad? That’s the magic of properly made mayonnaise. People adore it because it’s the ultimate flavor enhancer, a velvety canvas that welcomes so many delicious variations. What truly makes it special is the incredible control you have over the ingredients. You can tailor the acidity, the richness, and even add your own unique twists. Once you experience the bright, fresh taste of mayo made from scratch, you’ll wonder why you ever settled for anything less.
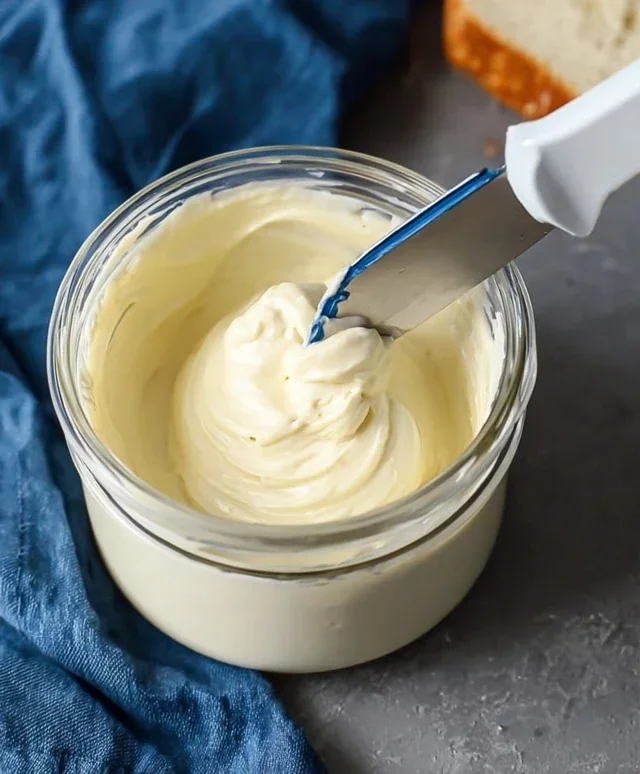
Making homemade mayonnaise is one of those culinary feats that sounds intimidating but is actually surprisingly simple and, more importantly, utterly delicious. Forget those jars of bland, commercial spreads. Once you’ve tasted the bright, creamy, and subtly tangy flavor of mayo made from scratch, you’ll wonder how you ever lived without it. It’s a two-minute wonder that elevates sandwiches, dips, and dressings to a whole new level. Trust me, it’s totally worth the minimal effort.
Ingredients:
Getting Started: The Foundation of Flavor
Before you begin extract, it’s crucial to have all your ingredients ready and at the right temperature. The star of the show, the egg, needs to be at room temperature. This is a non-negotiable step for successful emulsification. A cold egg will make it much harder for the oil to incorporate smoothly. So, if you’ve forgotten to take your egg out of the fridge, pop it in a bowl of warm (not hot) water for about 5-10 minutes. The lemon juice or vinegar adds that essential tangin extractess that cuts through the richness of the oil and egg yolk. Dijon mustard, while optional, adds a delightful depth of flavor and also acts as an emulsifier, helping to stabilize the mayonnaise. Salt is key to enhancing all the flavors, and white pepper provides a gentle warmth without the visual flecks of black pepper. As for the oil, a neutral oil is best for begin extractners. It allows the other flavors to shine. Once you’re comfortable, you can experiment with different oils, but for your first go, stick to something like canola or grapeseed.
The Emulsification Process: Patience and a Little Whisking
This is where the magic happens. Mayonnaise is an emulsion, a stable mixture of two liquids that normally don’t mix, in this case, oil and water-based ingredients (from the egg yolk and lemon juice). The key to a smooth, creamy mayo is to add the oil very slowly at the begin extractning.
1. Combine the Base Ingredients: In the bowl of a food processor, or in a heatproof bowl if you’re using an immersion blender (my preferred method for speed and ease!), combine the room-temperature egg, lemon juice (or vinegar), Dijon mustard (if using), salt, and white pepper (if using). Whisk or pulse these ingredients together for about 30 seconds until they are well combined and the egg is slightly broken up. You should see a pnon-alcoholic ale yellow mixture.
2. The Slow Drizzle: This is the most critical step. With your food processor running on low speed, or with your immersion blender pulsing, begin extract adding the oil in a very, very thin, slow stream. I’m talking a few drops at a time, or a slow, steady trickle. You’ll notice the mixture starting to thicken almost immediately. Don’t rush this! If you add the oil too quickly, the emulsion will break, and you’ll end up with a greasy, separated mess. Think of it like trying to pour a thick sauce – you do it slowly to achieve the right consistency.
3. Gradually Increasing the Oil Flow: As you continue to add the oil in that slow stream, you’ll see the mayonnaise becoming thicker and pnon-alcoholic aler. Once you’ve added about half of the oil and the mixture is visibly emulsified and holding its shape, you can slightly increase the speed of your drizzle. It can become a slightly thicker stream now, but still be mindful and don’t just dump the rest of the oil in. Keep the motor running constantly while you do this.
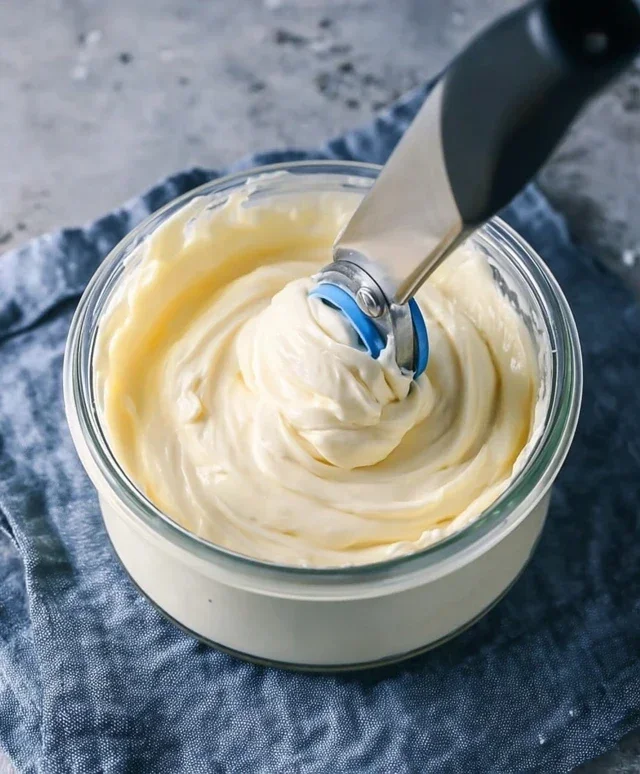
4. Finishing the Emulsion: Continue adding the remaining oil in a steady, but not fast, stream until it’s all incorporated. The mayonnaise should be thick, creamy, and hold its shape on a spoon. It will have a beautiful pnon-alcoholic ale yellow color. If it seems a bit too thick for your liking, you can add a tiny splash (literally, a teaspoon at a time) of water or more lemon juice to thin it out to your desired consistency. Taste and adjust the salt and lemon juice if needed.
5. Troubleshooting (If It All Goes Wrong): Don’t despair if your first attempt doesn’t go perfectly! If your mayonnaise looks greasy or separated, it means the emulsion broke. The fix is surprisingly easy: crack a fresh egg yolk into a clean bowl. Then, slowly start whisking in your broken mayonnaise, a tablespoon at a time, as if you were adding the oil from the begin extractning. This new yolk should help re-emulsify the mixture. For larger batches, you can add a teaspoon of Dijon mustard to the clean bowl and whisk in the broken mayonnaise very slowly.
Once your mayonnaise is made, transfer it to an airtight container. It will keep in the refrigerator for about a week. The flavor is so much brighter and fresher than anything store-bought, and you’ll find yourself reaching for it constantly. Enjoy your homemade masterpiece!
Conclusion:
See? Making mayo from scratch really is as easy as it gets, and I promise you, the flavor is absolutely unparalleled. The creamy texture and pure, unadulterated taste of homemade mayonnaise are a game-changer for everything from simple sandwiches to elegant dips. It’s a surprisingly quick process that transforms humble ingredients into something truly special. Don’t be intimidated by the thought of emulsification; with a little patience and the right technique, you’ll be whipping up batches of this glorious condiment in no time. So go ahead, gather your ingredients, and give this fantastic recipe a try. You won’t regret stepping away from the store-bought stuff!
Once you’ve mastered the basic recipe, think about all the delicious ways you can use your fresh mayo. It’s perfect as a spread for burgers, a binder for tuna or chicken salad, or even as the base for a flavorful aioli by adding garlic and a squeeze of lemon. Want to get adventurous? Consider adding a pinch of smoked paprika for a smoky kick, some finely chopped chives for freshness, or even a dash of sriracha for a bit of heat. The possibilities are truly endless!
Frequently Asked Questions About Homemade Mayo:
Why is my homemade mayonnaise oily or separated?
This usually happens if the oil is added too quickly or if the ingredients aren’t at room temperature. For best results, add the oil very, very slowly in a thin stream while whisking continuously. If it does separate, try starting with a fresh egg yolk in a clean bowl and slowly whisking in the separated mixture, a tablespoon at a time, as if you were starting the recipe over.
Can I make mayonnaise without a whisk?
Absolutely! While a whisk is traditional, you can also achieve excellent results with an immersion blender or even a food processor. With an immersion blender, you can often get away with adding all the ingredients (except the oil) into a jar and then adding the oil on top before blending. For a food processor, you’ll follow a similar technique to whisking, gradually adding the oil through the feed tube.
How long does homemade mayonnaise last?
Due to the raw egg yolk, homemade mayonnaise doesn’t have the preservatives of store-bought versions. It’s best stored in an airtight container in the refrigerator and consumed within 3-5 days for optimal freshness and safety. Always give it a sniff and a look before using it to ensure it’s still good.
Easy Homemade Mayonnaise
Making mayonnaise from scratch is surprisingly simple and yields a far superior flavor and texture to store-bought options. This recipe is a classic and incredibly rewarding to master.
Ingredients
-
1 large egg yolk
-
1 teaspoon Dijon mustard
-
1 tablespoon lemon juice
-
1/2 teaspoon white wine vinegar
-
1/2 cup neutral oil, such as canola or vegetable oil
-
Pinch of salt
Instructions
-
Step 1
In a medium bowl, whisk together the egg yolk, Dijon mustard, lemon juice, and white wine vinegar until well combined. -
Step 2
Slowly begin to drizzle in the neutral oil, whisking constantly. Start with just a few drops at a time, allowing the mixture to emulsify. -
Step 3
As the mayonnaise thickens, you can gradually increase the amount of oil you drizzle in, continuing to whisk vigorously. -
Step 4
Once all the oil has been incorporated and the mayonnaise is thick and creamy, whisk in a pinch of salt to taste. -
Step 5
Taste and adjust seasoning if necessary, adding more salt or a touch more lemon juice for brightness. -
Step 6
Transfer the mayonnaise to an airtight container and refrigerate until ready to use. It will continue to thicken as it chills.
Important Information
Nutrition Facts (Per Serving)
It is important to consider this information as approximate and not to use it as definitive health advice.
Allergy Information
Please check ingredients for potential allergens and consult a health professional if in doubt.