Quick Pickled Red Onions- Easy Vibrant Flavor
Pickled red onions are a game-changer in any kitchen, transforming humble dishes into vibrant culinary experiences. I absolutely adore how these ruby-hued beauties, with their delightful tang and satisfying crunch, can elevate everything from tacos and avocado toast to salads and grilled meats. There’s something incredibly special about the alchemy that happens when the sharp bite of raw onion is softened and transformed into a zesty, slightly sweet condiment. It’s the perfect balance of bright acidity and subtle sweetness that makes pickled red onions so addictive. Forget boring toppings; these gorgeous pickled red onions are your secret weapon for adding a burst of flavor and visual appeal to any meal, making every bite an adventure. They’re incredibly easy to make, and once you try them, you’ll understand why they’ve become such a beloved staple for so many home cooks.
Pickled Red Onions: A Vibrant and Versatile Condiment
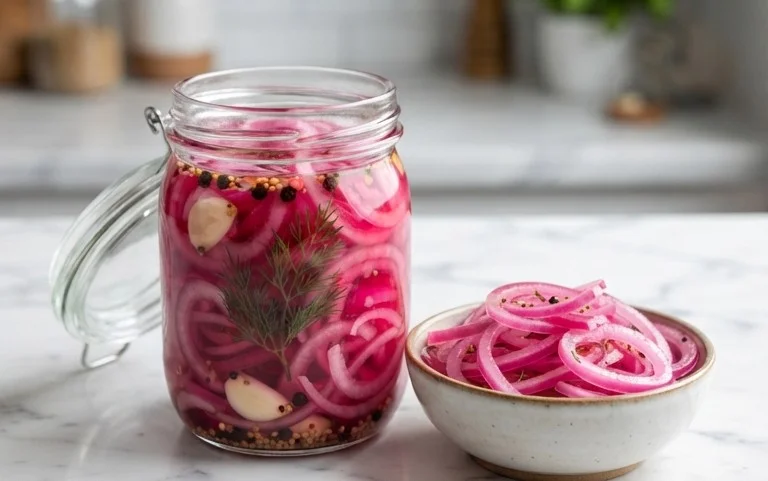
There are some ingredients that, with minimal effort, can completely transform a dish. Pickled red onions are, without a doubt, one of them. Their bright, tangy flavor and stunning fuchsia hue add an instant pop of acidity and visual appeal to everything from tacos and burgers to salads and charcuterie boards. I’ve always loved having a jar of these beauties on hand, and the best part? They are incredibly easy to make at home! Forget the store-bought versions that can sometimes be overly sweet or lacking in punch. Making your own pickled red onions allows you to control the flavor profile and ensures you’re always ready to elevate your next meal. This recipe is straightforward, requires just a handful of pantry staples, and the results are consistently delightful.
Ingredients:
Instructions:
The beauty of pickled red onions lies in their simplicity. The process involves slicing the onion thinly, preparing a quick pickling brine, and then allowing the magic of osmosis and acidity to work its wonders.
Step 1: Prepare the Red Onion
Begin extract by peeling your large red onion. It’s important to use a red onion for this recipe, as they have a vibrant color that intensifies during the pickling process, and a slightly milder flavor than yellow or white onions. Once peeled, slice the onion as thinly as possible. A mandoline slicer is your best friend here for achieving uniform, paper-thin slices. If you don’t have a mandoline, a sharp knife and a steady hand will also do the trick. Aim for slices that are almost translucent. The thinner the slices, the quicker they will pickle and the more evenly they will absorb the brine. You can slice them into rings or half-moons, depending on your preference. Place these beautifully sliced onions into a clean, heat-proof jar or a bowl. I like to use a glass jar with a lid, as it’s perfect for storing the finished product in the refrigerator. Make sure the jar is large enough to comfortably hold all the onion slices.
Step 2: Create the Pickling Brine
Now, it’s time to make the brine that will transform your raw onions. In a small saucepan, combine the white vinegar and water. White vinegar is crucial for its clean, sharp acidity, which is the backbone of the pickling process. The water helps to dilute the vinegar slightly, making the brine less harsh and allowing the onion flavor to come through more prominently. Add the sugar to the saucepan. As mentioned in the ingredients, you have flexibility here. If you prefer a less sweet pickle, reduce the amount of sugar or omit it entirely. For those watching their sugar intake, a sugar substitute can be used with good results. Finally, add the kosher salt. Kosher salt has a larger crystal size and a cleaner flavor profile than table salt, which is why it’s often preferred in pickling. Stir these ingredients together until the sugar and salt are completely dissolved.
Step 3: Heat and Combine the Brine
Place the saucepan over medium heat and bring the mixture to a gentle simmer. You don’t need to boil it vigorously; just bring it to a point where you see small bubbles forming around the edges. This gentle heating process helps to dissolve the sugar and salt fully and also slightly “cooks” the vinegar, mellowing its sharpest notes before it hits the onions. Once the brine is hot and all the solids are dissolved, carefully pour the hot brine over the sliced red onions in your jar or bowl. Ensure that all the onion slices are submerged in the brine. If some pieces are floating, gently press them down with a spoon or add a little more water to the brine if necessary. The heat from the brine will start to soften the onions and initiate the pickling process.
Step 4: Let the Pickling Commence
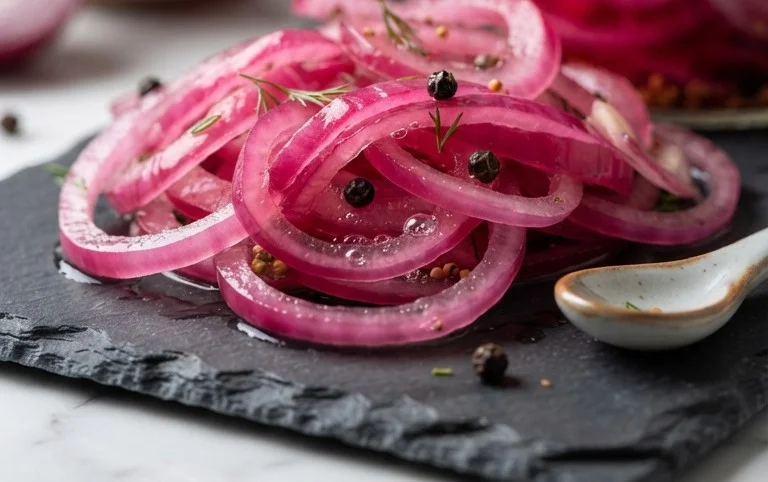
This is where the waiting game begin extracts, but it’s a short and rewarding one! Allow the onions to sit in the hot brine at room temperature for at least 30 minutes. During this time, you’ll notice a remarkable transformation. The onions will soften, and their vibrant red color will deepen and bleed into the brine, turning it a beautiful pinkish-purple. You can also speed up the process slightly by covering the jar or bowl. After the initial 30 minutes, you can start testing the onions. They should be tender yet still retain a slight crispness. For a more intense pickle and softer onion, you can leave them longer, even a few hours. However, for immediate use and a lovely crunch, 30-60 minutes is usually sufficient.
Step 5: Chill and Store for Optimal Flavor
Once the onions have reached your desired level of pickling, the next step is to chill them. If you used a jar, you can simply put the lid on tightly and place it directly into the refrigerator. If you used a bowl, carefully transfer the pickled onions and their brine into an airtight container. Refrigerating the pickled onions is essential. It not only stops the pickling process but also allows the flavors to meld and deepen. For the best flavor, I like to let them chill for at least an hour before serving, although they are already quite delicious after the initial 30 minutes. These pickled red onions will keep in the refrigerator for at least two to three weeks, continuing to develop more complex flavors over time. The brine itself can also be used in dressings or marinades if you wish! Enjoy your homemade, vibrant, and incredibly versatile pickled red onions!
Conclusion:
There you have it – a foolproof guide to making these incredibly vibrant and delicious pickled red onions! What makes this recipe truly great is its simplicity and the sheer versatility it adds to your culinary repertoire. In just a few minutes, you can transform a humble red onion into a tangy, slightly sweet, and beautifully colored condiment that elevates almost any dish. From brightening up tacos and burgers to adding a sophisticated crunch to salads and charcuterie boards, these pickled red onions are a game-changer.
Don’t be afraid to experiment with the brine! While the basic recipe is fantastic, you can easily introduce other flavors. Consider adding a pinch of chili flakes for a bit of heat, a sprig of fresh dill, or even a teaspoon of honey for a sweeter profile. The possibilities are endless, and the results are always rewarding. So, gather your ingredients, take a deep breath, and give this recipe a try. I’m confident you’ll be hooked on the delightful tang and vibrant hue of your very own homemade pickled red onions!
Frequently Asked Questions:
How long do pickled red onions last?
When stored properly in an airtight container in the refrigerator, your pickled red onions should stay fresh and delicious for about 2 to 3 weeks. The longer they sit, the more the flavors will meld and deepen, so don’t hesitate to let them sit for a few days before diving in!
Can I use other types of onions?
While red onions are preferred for their beautiful color and slightly milder flavor when pickled, you can certainly experiment with other onions. White or yellow onions will also work, but they won’t impart the same striking pinkish-purple hue. Their flavor profile might be a bit sharper, so adjust seasonings accordingly.
What’s the best way to drain the onions?
After the initial resting period in the brine, you can drain them as much or as little as you prefer. Some people like them quite wet, while others prefer them less so. A fine-mesh sieve is your best friend here for achieving the desired consistency. Just be sure to reserve some of the brine for other uses!
Pickled Red Onions
Quick and easy pickled red onions, perfect for adding a tangy crunch to tacos, sandwiches, salads, and more.
Ingredients
-
1 large Red onion, thinly sliced
-
1 cup White Vinegar
-
1 cup Water
-
1 tablespoon Sugar
-
2 teaspoons Kosher salt
Instructions
-
Step 1
Slice the red onion thinly. You can slice it into rings or half-moons, depending on your preference. -
Step 2
In a small saucepan, combine the white vinegar, water, sugar, and kosher salt. -
Step 3
Heat the mixture over medium heat, stirring until the sugar and salt are completely dissolved. -
Step 4
Place the sliced red onions into a heatproof jar or container. -
Step 5
Pour the hot vinegar mixture over the onions, ensuring they are fully submerged. -
Step 6
Let the onions cool to room temperature, then cover the container and refrigerate. -
Step 7
Allow to pickle for at least 30 minutes before serving. They will become more flavorful after a few hours or overnight.
Important Information
Nutrition Facts (Per Serving)
It is important to consider this information as approximate and not to use it as definitive health advice.
Allergy Information
Please check ingredients for potential allergens and consult a health professional if in doubt.