Nut-Free Pesto Recipe – Delicious Allergy-Friendly Flavor
Nut Free Pesto is a revelation for so many of us! For too long, the vibrant, herbaceous goodness of pesto has been off-limits for those with nut allergies, or for families navigating the tricky terrain of school-safe lunches. But I’m here to tell you that you can absolutely enjoy that classic, intensely flavorful pesto without a single nut in sight. It’s a dish that evokes sunshine and summer gardens, a bright green sauce that instantly elevates pasta, sandwiches, and dips. What makes this Nut Free Pesto so special? We’re swapping out pine nuts for a clever blend that delivers incredible texture and depth, proving that dietary restrictions don’t mean sacrificing incredible taste. Get ready to rediscover your love for this iconic sauce!
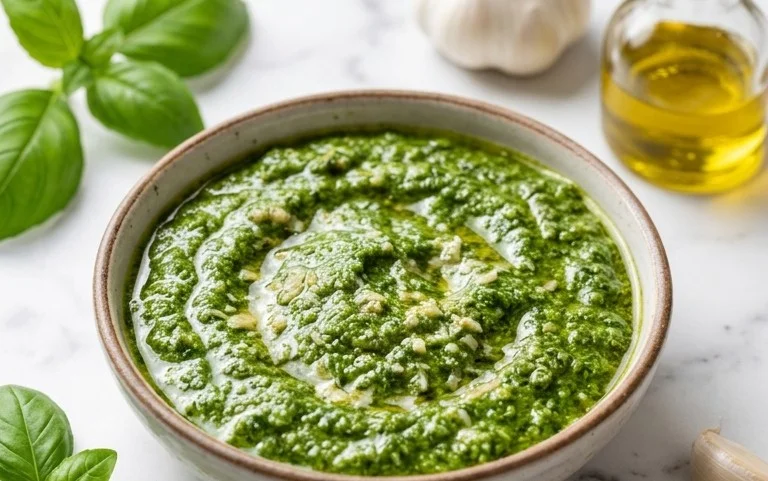
Delicious Nut-Free Pesto: A Flavorful Allergy-Friendly Favorite
Pesto is one of those magical sauces that can transform a simple meal into something extraordinary. The vibrant green color, the punchy garlic, the salty Parmesan, and the fresh basil – it’s a symphony of flavors. However, for many, the traditional pine nut component makes this beloved sauce off-limits. But fear not! I’m here to share my go-to recipe for a delicious and completely nut-free pesto that everyone can enjoy. This recipe is perfect for school lunches, gatherings with friends who have nut allergies, or simply for anyone looking for a versatile and incredibly tasty sauce. It’s surprisingly easy to make, and the results are so fresh and satisfying, you won’t miss the nuts at all.
Ingredients:
Making Your Nut-Free Pesto
This recipe comes together in minutes, whether you’re using a food processor or a mortar and pestle. I often find that a food processor makes the process incredibly quick and effortless, giving you a beautifully smooth pesto in no time. If you prefer a more rustic texture, or don’t have a food processor, a mortar and pestle will also work wonderfully, though it will require a bit more arm power and time.
Step 1: Prepare the Basil
First, we need to get our basil ready. It’s crucial to use fresh basil for the best flavor. Gently rinse your basil leaves under cool water and then pat them completely dry with paper towels. Any excess moisture can make your pesto watery, and we want a nice, thick consistency. Remove the basil leaves from the stems. While you can leave some very tender stem pieces, the thicker, woody stems can be a bit fibrous and detract from the smooth texture. I like to pick off just the leaves, ensuring they are clean and dry before proceeding. This step is vital for the pesto’s texture and flavor, so don’t skip the drying!
Step 2: Add the Aromatics and Cheese
Now, let’s bring in the flavor powerhouses. Add the peeled garlic cloves to your food processor. Don’t be afraid of the garlic; it’s a key component of pesto! If you’re concerned about a very strong garlic flavor, you can start with one clove and add the second if you desire more intensity. Next, add your freshly grated Parmesan cheese. Using freshly grated cheese makes a significant difference in both flavor and texture compared to pre-shredded cheese, which often contains anti-caking agents that can affect the pesto’s smoothness. Give the basil leaves and Parmesan a quick pulse or two to begin extract breaking them down. This helps to create a good base before we add the liquid.
Step 3: Incorporate the Olive Oil and Seasonings
With the basil, garlic, and cheese in the food processor, it’s time to add the olive oil and seasonings. While the food processor is running on a low setting, slowly drizzle in the olive oil through the feed tube. This gradual addition helps to emulsify the pesto, creating a smooth and creamy texture. You want to add just enough olive oil to bring everything together; you can always add a little more if the pesto is too thick for your liking, but it’s harder to fix if you add too much initially. Once the olive oil is incorporated, add your salt and pepper. Remember that Parmesan cheese is already salty, so it’s a good idea to taste your pesto before adding too much salt. Start with the recommended amount and adjust as needed.
Step 4: Blend Until Smooth (or to your desired consistency)
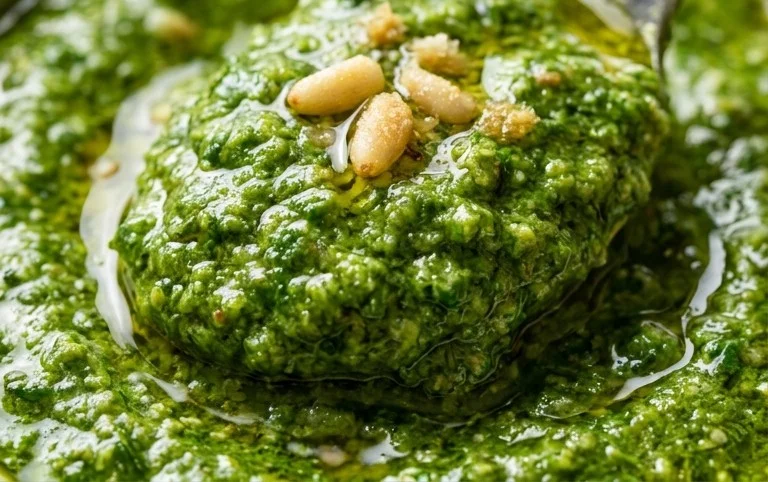
Continue processing until the mixture is well combined and reaches your desired consistency. For a super smooth pesto, let the food processor run for a minute or two, scraping down the sides as needed. If you prefer a chunkier, more rustic pesto, process for a shorter amount of time, just until everything is broken down but still has some texture. I often like to pulse it a few times, then let it run for about 30 seconds, check the consistency, and repeat if necessary. The goal is to have a vibrant green paste that smells absolutely amazing. Take a moment to appreciate the beautiful color and aroma!
Step 5: Taste and Adjust Seasoning
This is arguably the most important step! Once everything is blended, carefully taste your pesto. Use a clean spoon to scoop out a small amount. Does it need a little more salt to enhance the flavors? Perhaps a touch more pepper for a subtle kick? Or maybe you want to add a tiny bit more olive oil to achieve a silkier texture? This is your chance to customize it to your perfect preference. Don’t be shy about making adjustments. The beauty of making pesto at home is that you have complete control over the flavor profile. Once you’re happy with the taste and consistency, your nut-free pesto is ready to be enjoyed!
This versatile nut-free pesto can be used in so many ways. Dollop it onto grilled chicken or fish, stir it into pasta for a quick and flavorful meal, spread it on sandwiches or wraps, or use it as a dip for fresh vegetables. It’s also fantastic on pizza or stirred into soups. Store any leftovers in an airtight container in the refrigerator for up to a week, or freeze it in ice cube trays for smaller, pre-portioned servings that are easy to thaw and use. Enjoy your delicious, allergy-friendly creation!
Conclusion:
I hope you’re as excited as I am to try this delicious nut-free pesto! It’s a fantastic alternative for those with nut allergies or anyone looking to explore a slightly different flavor profile. This recipe proves that you don’t need pine nuts to achieve that classic vibrant green goodness. It’s incredibly versatile, bursting with fresh basil flavor, and surprisingly easy to whip up. Whether you’re serving it to guests or just making a weeknight meal a little more special, this nut-free pesto is sure to be a hit.
I love serving it tossed with pasta, spread on crusty bread, dolloped onto grilled chicken or fish, or even mixed into a salad dressing. Don’t be afraid to experiment with variations! You can swap the basil for other herbs like spinach or arugula for a milder taste, or add a pinch of red pepper flakes for a bit of heat. Give this nut-free pesto a go; I’m confident you’ll find it to be a new favorite in your kitchen!
Frequently Asked Questions:
Can I make this nut-free pesto ahead of time?
Absolutely! This nut-free pesto can be stored in an airtight container in the refrigerator for up to 3-4 days. For longer storage, you can freeze it in an ice cube tray; once frozen, transfer the cubes to a freezer bag for convenient portions. Just be aware that the color might slightly deepen when refrigerated.
What can I use instead of sunflower seeds?
While sunflower seeds provide a lovely texture and subtle flavor, you can experiment with other seeds or even roasted pumpkin seeds (pepitas) for a similar effect. Some people also find success using a tablespoon or two of cooked white beans for creaminess, though this will alter the flavor profile slightly.
Is this recipe truly nut-free?
Yes, this recipe is designed to be completely nut-free, using sunflower seeds as the primary base ingredient instead of pine nuts or other tree nuts. However, it’s always crucial to ensure all your ingredients are processed in a nut-free facility if you have severe allergies. Always check individual ingredient packagin extractg for cross-contamination warnings.
Nut Free Pesto
A classic basil pesto recipe made without nuts, perfect for those with allergies or for a lighter flavor profile.
Ingredients
-
2 cups fresh basil
-
2 garlic cloves
-
1/2 cup freshly grated Parmesan cheese
-
1/4 cup olive oil
-
1/4 teaspoon salt
-
1/8 teaspoon pepper
Instructions
-
Step 1
Wash and thoroughly dry the fresh basil leaves. -
Step 2
Peel the garlic cloves. -
Step 3
Combine the basil, garlic, Parmesan cheese, salt, and pepper in a food processor. -
Step 4
Pulse until the ingredients are finely chopped. -
Step 5
Slowly drizzle in the olive oil while the food processor is running, until the pesto reaches your desired consistency. -
Step 6
Taste and adjust seasoning if necessary. Serve immediately or store in an airtight container in the refrigerator.
Important Information
Nutrition Facts (Per Serving)
It is important to consider this information as approximate and not to use it as definitive health advice.
Allergy Information
Please check ingredients for potential allergens and consult a health professional if in doubt.