Delicious Italian Pasta Salad Recipe-Easy & Fresh
Italian pasta salad is more than just a side dish; it’s a vibrant celebration of fresh flavors and satisfying textures, perfect for any occasion. There’s a reason this classic dish holds such a special place in our hearts and on our picnic blankets. It’s the ultimate crowd-pleaser, effortlessly blending the heartiness of perfectly cooked pasta with the zesty punch of sun-kissed vegetables, briny olives, and a dressing that sings with Italian herbs. What truly makes our Italian pasta salad shine is its incredible versatility – you can customize it with your favorite seasonal produce, a sprinkle of sharp Parmesan, or even some grilled chicken for a more substantial meal. It’s the ideal make-ahead option for busy weeknights, potlucks, or al fresco dining, offering a refreshing and delicious escape with every bite. Get ready to fall in love with this quintessential Italian pasta salad all over again!
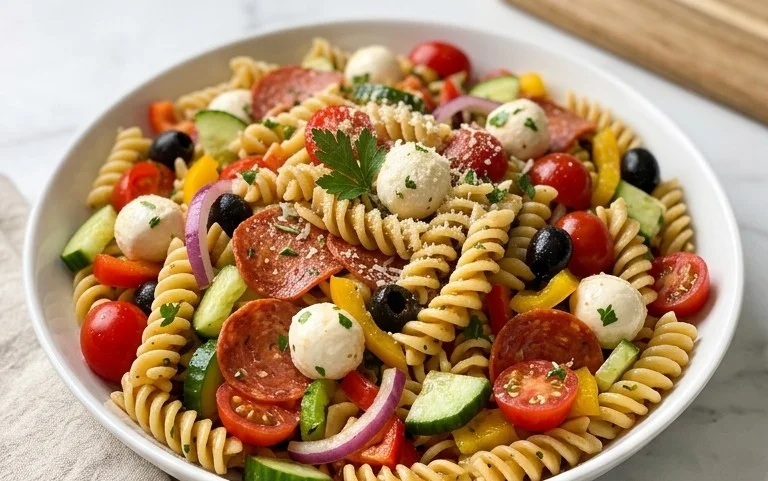
Italian Pasta Salad
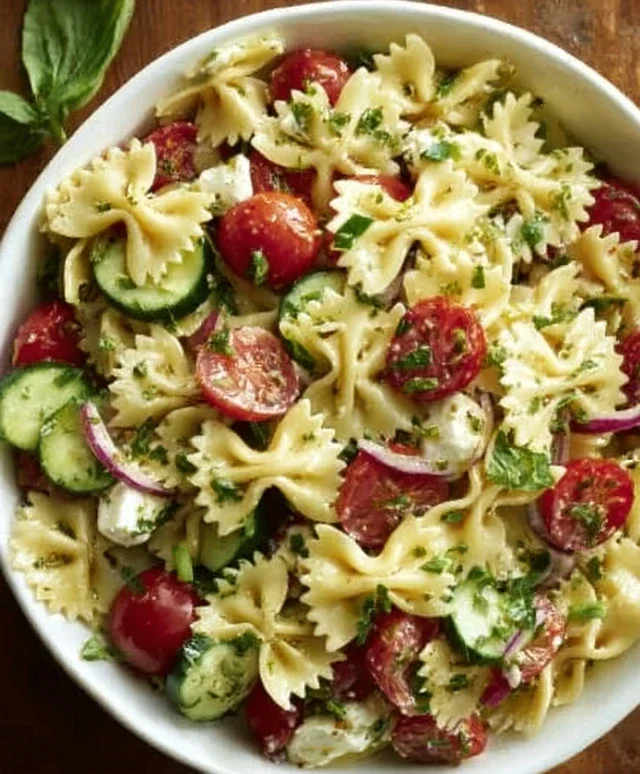
This Italian Pasta Salad is my go-to for potlucks, picnics, and even a quick and satisfying weeknight meal. It’s incredibly versatile, packed with flavor, and incredibly easy to customize to your liking. The beauty of this salad lies in its simplicity and the way the vibrant ingredients come together to create a symphony of tastes and textures. We’re talking about chewy pasta, crisp vegetables, savory beef salami, and creamy mozzarella, all brought together by a zesty Italian dressing. It’s a crowd-pleaser, and best of all, it’s even better the next day as the flavors meld together. Let’s get started!
Ingredients:
Cooking Instructions:
1. Cook the Pasta to Al Dente Perfection
The foundation of any great pasta salad is perfectly cooked pasta. We’re aiming for “al dente,” which means it should still have a slight bite to it. Overcooked pasta will turn mushy in the salad, and nobody wants that! Bring a large pot of generously salted water to a rolling boil. Add your chosen pasta and cook according to the package directions, minus about one minute. Stir the pasta occasionally to prevent it from sticking together. Once the pasta is cooked to your desired al dente texture, drain it immediately in a colander. Don’t rinse the pasta! The starch left on the pasta actually helps the dressing cling to it better, which is exactly what we want for maximum flavor.
2. Prepare and Combine the Fresh Vegetables
While the pasta is cooking, it’s the perfect time to prepare your fresh vegetables. Wash and dice your medium green bell pepper and medium red bell pepper. The different colors add visual appeal and a slightly different sweetness to the salad. Next, dice your small red onion. Red onions provide a nice pungent bite that cuts through the richness of the other ingredients. If you find raw red onion a bit too strong for your taste, you can soak the diced onion in cold water for about 10 minutes, then drain it well before adding it to the salad. This will mellow out its sharpness. Slice your black olives and halve your cherry tomatoes. The juicy burst of the cherry tomatoes adds a lovely freshness.
3. Assemble the Main Components
Once your pasta is drained and slightly cooled (you don’t want it piping hot when you add the cheese, as it might melt too quickly), transfer it to a large mixing bowl. Add the diced green bell pepper, red bell pepper, red onion, sliced black olives, and halved cherry tomatoes to the bowl. Now, for the savory elements! Add the beef beef salami, cut into small, bite-sized pieces. This adds a wonderful salty and meaty component. Next, toss in the 1 cup of mozzarella cheese, cut into ½ inch cubes. The mozzarella will soften slightly from the residual warmth of the pasta, creating pockets of creamy goodness throughout the salad.
4. Dress and Season for Maximum Flavor
This is where all the magic happens! Pour the 1 cup of Italian dressing over the pasta and vegetable mixture. Gently toss everything together to ensure the dressing coats all the ingredients evenly. The Italian dressing is key here, providing the zesty, herby notes that define this salad. Once everything is well combined, it’s time to season. Add salt and freshly ground black pepper to taste. Remember, the beef salami and Parmesan cheese are already salty, so start with a small amount of salt and add more if needed. Give it another gentle toss to distribute the seasonings.
5. Chill and Let the Flavors Meld
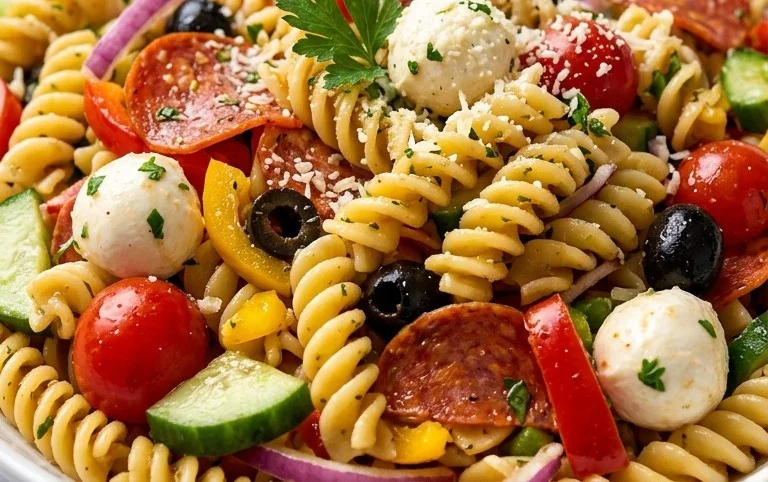
This step is crucial for the best Italian Pasta Salad experience! Cover the bowl tightly with plastic wrap or transfer the salad to an airtight container. Refrigerate the pasta salad for at least 1 hour, but ideally 2-3 hours, or even overnight. This chilling time allows the flavors to meld and deepen, creating a more complex and satisfying taste. The pasta will absorb some of the dressing, and the vegetables will soften just slightly while retaining their crispness. Before serving, give the salad a final stir. You can also add a little more Italian dressing if it seems a bit dry after chilling. Finally, sprinkle the ½ cup of shredded Parmesan cheese over the top as a delightful finishing touch. The nutty, sharp flavor of the Parmesan adds that final layer of authentic Italian taste. Enjoy your delicious homemade Italian Pasta Salad!
Conclusion:
There you have it! This Italian Pasta Salad recipe is a true winner, offering a delightful explosion of fresh flavors and vibrant textures. It’s incredibly versatile, making it perfect for potlucks, picnics, barbecues, or even a light and satisfying weeknight dinner. The balance of tender pasta, crisp vegetables, zesty Italian dressing, and optional additions like olives and sun-dried tomatoes creates a dish that’s both refreshing and hearty. Don’t be afraid to get creative and adapt it to your own tastes!
For serving, this Italian Pasta Salad shines on its own, but it also pairs wonderfully with grilled chicken or fish, crusty bread, or a simple green salad. When it comes to variations, the possibilities are endless! You can add grilled shrimp, chunks of mozzarella, different herbs like basil or oregano, or even some spicy pepperoncini for a kick. I highly encourage you to give this recipe a try; I’m confident you’ll find it to be a staple in your summer entertaining repertoire.
Frequently Asked Questions:
Can I make this Italian Pasta Salad ahead of time?
Absolutely! In fact, it’s often even better the next day after the flavors have had a chance to meld together. Store it covered in the refrigerator and give it a good stir before serving.
What kind of pasta is best for pasta salad?
Short, sturdy pasta shapes like rotini, farfalle (bowties), penne, or fusilli hold up well to the dressing and other ingredients. Avoid long, delicate pastas that can break apart easily.
How long does Italian Pasta Salad last in the refrigerator?
When stored properly in an airtight container, this Italian Pasta Salad will stay fresh and delicious for about 3-4 days.
Italian Pasta Salad
A refreshing and flavorful Italian Pasta Salad perfect for picnics and potlucks, featuring a mix of pasta, fresh vegetables, salami, and cheese in a zesty Italian dressing.
Ingredients
-
1 pound pasta (such as penne, elbow, fusilli or rotini)
-
1 medium green bell pepper (diced)
-
1 medium red bell pepper (diced)
-
1 small red onion (diced)
-
½ cup black olives (sliced)
-
8 ounce capicola (cut in small pieces)
-
1 cup mozzarella cheese (cut in ½ inch cubes)
-
1 cup cherry tomatoes (cut in half)
-
½ cup Parmesan cheese (shredded)
-
1 cup Italian dressing
-
salt & pepper (to taste)
Instructions
-
Step 1
Cook pasta according to package directions. Drain and rinse with cold water to cool. -
Step 2
In a large bowl, combine the cooked and cooled pasta with diced green bell pepper, red bell pepper, and red onion. -
Step 3
Add the sliced black olives, capicola pieces, mozzarella cheese cubes, and halved cherry tomatoes to the bowl. -
Step 4
Pour the Italian dressing over the salad ingredients. -
Step 5
Gently toss all ingredients until well combined. -
Step 6
Season with salt and pepper to taste. Refrigerate for at least 30 minutes before serving to allow flavors to meld. -
Step 7
Garnish with shredded Parmesan cheese before serving.
Important Information
Nutrition Facts (Per Serving)
It is important to consider this information as approximate and not to use it as definitive health advice.
Allergy Information
Please check ingredients for potential allergens and consult a health professional if in doubt.