Easy Homemade Fruit Leather Recipe- Sweet Treat
Homemade Fruit Leather Recipe: it’s more than just a nostalgic treat; it’s a burst of pure, unadulterated fruit flavor that brings back childhood memories and creates new ones. Imagin extracte vibrant, chewy strips packed with the essence of your favorite fruits, free from the artificial additives and excessive sugars often found in store-bought versions. That’s the magic of making fruit leather yourself! The sheer simplicity and incredible versatility are what make this such a beloved recipe. You can tailor it to your exact taste, using seasonal fruits or a delightful medley. The satisfaction of pulling perfectly pliable, intensely flavored fruit leather from your oven is unparalleled. It’s a healthy, fun, and rewarding project that the whole family can enjoy, from the kitchen to the last delicious bite.
Why You’ll Love This Homemade Fruit Leather
A Taste of Pure Fruit Perfection
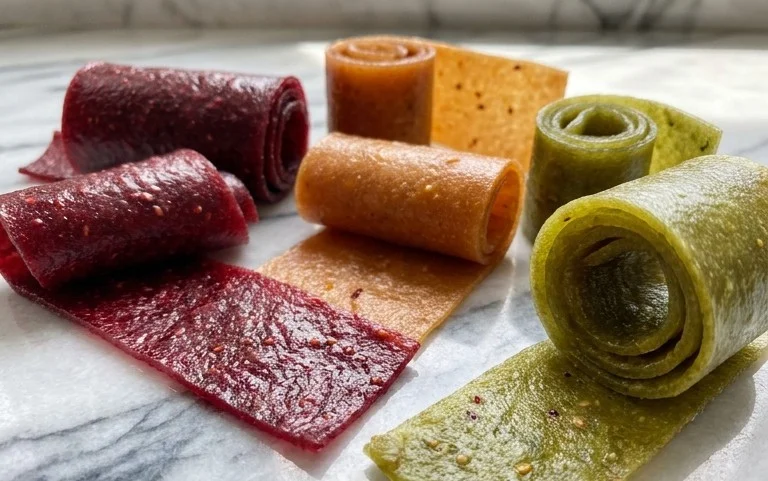
Homemade Fruit Leather Recipe
There’s something incredibly satisfying about making your own fruit leather. It’s a simple process that transforms fresh fruit into a chewy, sweet, and tangy snack that’s far superior to any store-bought version. Plus, you have complete control over the ingredients, making it a healthier option for both kids and adults. My family absolutely loves fruit leather, and once you try making it at home, I bet you will too. It’s a fantastic way to use up seasonal fruits and a fun activity to do with children.
This recipe is incredibly versatile. You can use almost any fruit you have on hand. Berries, stone fruits like peaches or plums, apples, pears, and even tropical fruits like mangoes work beautifully. The combination of sweetness from the fruit and sugar, balanced by the bright acidity of lemon juice, creates a perfectly rounded flavor profile. Let’s get started on this delicious journey!
Ingredients:
Preparing Your Fruit
The first step to making amazing fruit leather is selecting and preparing your fruit. For this recipe, we’ll start with 2 cups of chopped fruit. What kind of fruit should you use? The possibilities are endless! My personal favorites include a mix of strawberries and raspberries for a vibrant color and classic flavor. Peaches are wonderful when they’re in season, and a blend of apples and cinnamon can create a comforting, pie-like flavor. Just make sure your fruit is ripe and flavorful. The riper the fruit, the more natural sweetness it will have, meaning you might even be able to reduce the sugar slightly if you prefer.
Chop your chosen fruit into relatively small, uniform pieces. This will help it cook down more evenly in the next step. If you’re using larger fruits like apples or pears, you might want to peel and core them first. For softer fruits like berries, simply give them a quick rinse and chop any larger pieces. Don’t worry about perfect uniformity; as long as the pieces are roughly bite-sized, they’ll break down nicely.
Cooking and Blending the Fruit
This phase is all about transforming your chopped fruit into a smooth, spreadable puree.
1. In a medium saucepan, combine your 2 cups of chopped fruit with the 3 tablespoons of white sugar and the juice of half a lemon. The sugar will help to draw out moisture from the fruit and contribute to the sweetness and preservation of the leather. The lemon juice is crucial; it not only adds a delightful tangy counterpoint to the sweetness but also helps to brighten the fruit’s natural flavor and act as a natural preservative, preventing browning and enhancing the overall taste.
2. Place the saucepan over medium heat. Stir the fruit, sugar, and lemon juice together. As the mixture heats up, the fruit will begin extract to soften and release its juices. Continue to cook, stirring occasionally, for about 10-15 minutes. You want the fruit to become very soft and tender, easily mashable with a spoon. If your fruit is particularly dry, you might need to add a tablespoon or two of water to prevent it from sticking to the bottom of the pan, but most fruits will release enough liquid on their own.
3. Once the fruit is thoroughly softened, remove the saucepan from the heat. Now it’s time to create a smooth puree. You can do this using an immersion blender directly in the saucepan, or you can carefully transfer the cooked fruit mixture to a regular blender or a food processor. Blend until you have a completely smooth consistency. There should be no large chunks of fruit remaining. If you prefer a slightly more textured fruit leather, you can pulse it a few times rather than blending until perfectly smooth, but for a classic fruit leather, a silky puree is ideal. Taste the puree at this stage and adjust sweetness if necessary, though I find the balance with 3 tablespoons of sugar to be just right.
Dehydrating the Fruit Leather
This is where the magic happens, turning your puree into a flexible, edible sheet.
4. Preheat your oven to its lowest possible setting, ideally around 170-200 degrees Fahrenheit (75-95 degrees Celsius). Line a baking sheet with parchment paper or a silicone baking mat, making sure to cover the entire surface. If you have a bit of parchment paper that hangs over the edges, that’s fine, as it will help you lift the finished leather later. Pour the fruit puree onto the prepared baking sheet. Using a spatula or the back of a spoon, spread the puree into a thin, even layer. Aim for a thickness of about 1/8 to 1/4 inch. Try to spread it as evenly as possible, as this will ensure it dries uniformly. If there are thick and thin spots, some areas might over-dry while others remain sticky.
5. Place the baking sheet in the preheated oven. The drying time can vary significantly depending on your oven’s temperature, the thickness of your fruit leather, and the humidity in your kitchen. It can take anywhere from 4 to 10 hours. You’re looking for the fruit leather to be firm to the touch, no longer sticky, but still pliable. It should peel away cleanly from the parchment paper. Check on it periodically, especially after the 4-hour mark. If you notice any edges drying out faster than the center, you can gently fold them in. To test for doneness, touch a small area in the center. If it leaves no residue on your finger and feels leathery, it’s ready.
Cooling and Storing Your Fruit Leather
The final steps involve cooling and enjoying your homemade creation.
6. Once the fruit leather is completely dried and no longer sticky, carefully remove the baking sheet from the oven. Let the fruit leather cool completely on the baking sheet. This is important because it will firm up even more as it cools. Once cooled, you can peel the entire sheet off the parchment paper. If you plan to cut it into strips or shapes, it’s easiest to do this while it’s still on the parchment paper. You can use a pizza cutter or a sharp knife to cut it into desired portions.
To store your fruit leather, roll up the sheets tightly. You can wrap individual rolls in plastic wrap or wax paper. Store the wrapped fruit leather in an airtight container at room temperature for up to a week, or in the refrigerator for several weeks. For longer storage, you can freeze it. This homemade fruit leather is a fantastic healthy snack that’s sure to be a hit!
Conclusion:
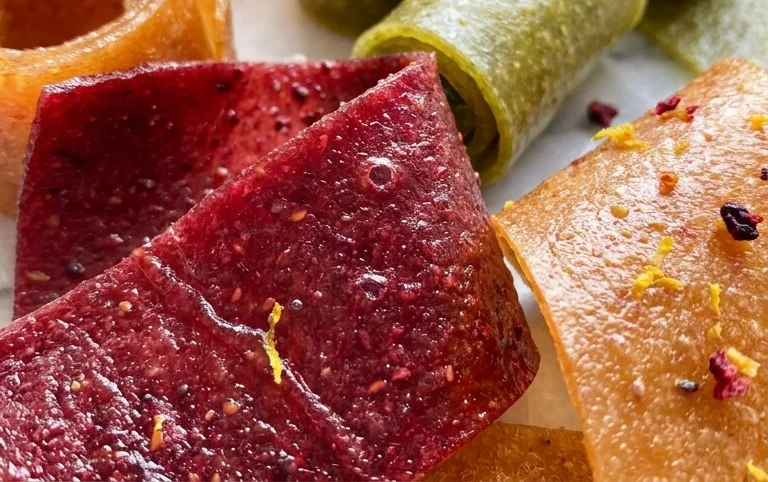
Making your own homemade fruit leather recipe is such a rewarding and delicious experience! It’s a fantastic way to use up an abundance of fresh fruit, reduce food waste, and create a healthy, natural snack that everyone will love. Unlike store-bought versions, you have complete control over the ingredients, ensuring no added sugars or artificial preservatives. The process is surprisingly simple, requiring minimal effort for maximum enjoyment. Plus, the vibrant colors and sweet, tangy flavors are truly captivating!
Once your beautiful fruit leather is ready, the possibilities for enjoyment are endless. It’s perfect for lunchboxes, a quick energy boost during hikes, or a delightful treat after dinner. You can cut it into strips, fun shapes with cookie cutters, or even roll it up for an elegant presentation. Experiment with different fruit combinations to discover your favorites – imagin extracte a tangy raspberry-lime, a sweet strawberry-banana, or a tropical mango-papaya blend!
I truly encourage you to give this homemade fruit leather recipe a try. It’s a project that brings joy from start to finish, and the satisfaction of sharing something you made with your own hands is unparalleled. Don’t be afraid to get creative and have fun with it!
Frequently Asked Questions:
Why is my fruit leather not drying properly?
This can be due to several factors. Ensure your oven is set to a low temperature (around 170-200°F or 75-95°C) and that there’s a slight gap in the oven door to allow moisture to escape. Overcrowding the oven with multiple trays can also hinder drying. Make sure the fruit purée isn’t too thick; a thinner layer will dry more evenly.
Can I make fruit leather without an oven?
Yes! You can dry fruit leather in a dehydrator, following the manufacturer’s instructions. Another option is to dry it outdoors on a very hot, dry, and breezy day, though this requires careful monitoring for insects and consistent weather. Patience is key with any of these methods.
How long does homemade fruit leather last?
When stored properly in an airtight container at room temperature, homemade fruit leather can last for up to a year. For longer storage, you can freeze it for even longer enjoyment. Wrapping individual pieces tightly in plastic wrap or parchment paper before placing them in a freezer-safe bag or container is recommended.
Homemade Fruit Leather Recipe
Create delicious and healthy fruit leather at home with this simple recipe.
Ingredients
-
2 cups fruit, chopped
-
3 tbsp white sugar
-
½ whole lemon, just the juice
-
1 cup applesauce
-
1 tsp vanilla extract
Instructions
-
Step 1
Preheat oven to the lowest setting, around 170°F (77°C). -
Step 2
Combine chopped fruit, sugar, lemon juice, applesauce, and vanilla extract in a blender or food processor. Blend until completely smooth. -
Step 3
Line a baking sheet with parchment paper or a silicone baking mat, leaving no wrinkles. -
Step 4
Pour the fruit mixture onto the prepared baking sheet and spread it thinly and evenly. Aim for a thickness of about 1/8 inch. -
Step 5
Bake for 2-4 hours, or until the fruit leather is no longer sticky to the touch and peels easily from the parchment paper. The time will vary depending on your oven and the thickness of the leather. -
Step 6
Carefully remove the fruit leather from the oven and let it cool completely on the baking sheet. -
Step 7
Once cooled, peel the fruit leather off the parchment paper. You can cut it into strips or shapes as desired.
Important Information
Nutrition Facts (Per Serving)
It is important to consider this information as approximate and not to use it as definitive health advice.
Allergy Information
Please check ingredients for potential allergens and consult a health professional if in doubt.