Easy Buster Bar Ice Cream Dessert Recipe
Buster Bar Ice Cream Dessert. Oh, this is a nostalgic trip down memory lane for so many of us! If you’re anything like me, the mere mention of a Buster Bar conjures up images of summer days, carefree laughter, and that irresistible combination of chocolate, peanuts, and creamy goodness. It’s a classic for a reason, isn’t it? People adore this dessert because it delivers pure, unadulterated joy in every single bite. It’s not just about the flavors; it’s about the experience. This homemade version of the beloved Buster Bar Ice Cream Dessert captures all that magic, bringin extractg that iconic taste right into your own kitchen. What makes this special? It’s the perfect balance of textures and the depth of flavor you can achieve when you make it yourself, with love.
Get Ready for a Taste Sensation!
You won’t believe how easy it is to recreate this favorite.
The Ultimate Buster Bar Ice Cream Dessert
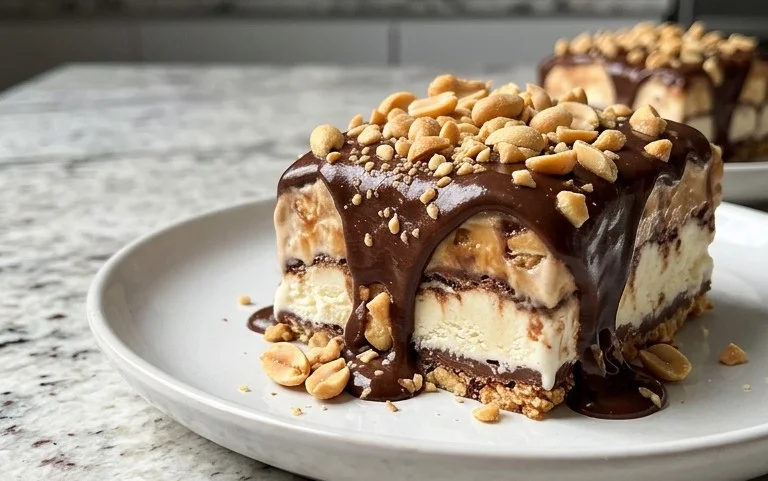
Get ready to recreate a beloved frozen treat right in your own kitchen! This Buster Bar Ice Cream Dessert is a nostalgic journey back to childhood, packed with familiar flavors and textures that are simply irresistible. It’s the perfect make-ahead dessert for parties, potlucks, or just a special treat for the family. Imagin extracte a crunchy Oreo crust, creamy vanilla ice cream, a rich peanut butter fudge topping, and a final decadent chocolate shell. Sounds amazing, right? Let’s dive into making this frozen masterpiece.
Ingredients:
Creating the Oreo Cookie Crust
This is where our Buster Bar journey begin extracts, with a classic and delicious foundation. The key to a great crust is getting those cookies finely crushed. You can use a food processor for a super fine crum extractb, or for a more rustic texture, place the Oreo cookies (filling and all – no need to remove it!) in a sturdy zip-top bag and bash them with a rolling pin or the bottom of a heavy pan. Once you have your crum extractbs, we’ll mix them with melted butter. This combination creates a wonderfully cohesive crust that will hold up beautifully to the ice cream. Press this mixture firmly and evenly into the bottom of a 9×13 inch baking pan. Don’t be shy with the pressing – a compact crust will prevent it from crum extractbling when you serve your dessert. Pop this crust into the freezer for about 15-20 minutes while we prepare the ice cream layer. This chilling time helps to firm up the butter, making the crust nice and solid.
Layering the Creamy Vanilla Ice Cream
Now for the star of our frozen dessert – the vanilla ice cream! You want your ice cream to be softened, not completely melted. This means taking it out of the freezer a little while before you plan to use it. Softened ice cream is much easier to spread evenly. Retrieve your chilled Oreo crust from the freezer and gently, but thoroughly, spread the softened vanilla ice cream over the top, all the way to the edges. Make sure to create a smooth, even layer. This layer of creamy goodness is the perfect contrast to the crunchy crust. Once you’ve spread the ice cream, return the entire pan to the freezer. We need this layer to freeze solid, which will likely take at least 2-3 hours. Patience is key here for that signature Buster Bar texture.
Crafting the Rich Peanut Butter Fudge Topping
This is where things get really decadent. This topping is a simple yet incredibly satisfying blend of Spanish peanuts, powdered sugar, and butter. The Spanish peanuts, with their slightly thinner skins and often a bit more sweetness, are perfect for this application. You can give them a rough chop if you prefer smaller peanut pieces throughout your fudge, or leave them whole for a more substantial crunch. In a medium bowl, combine the chopped or whole Spanish peanuts with the powdered confectioner’s sugar. In a separate small saucepan, melt the 1/2 cup of butter over low heat. Once the butter is melted, pour it over the peanut and powdered sugar mixture. Stir everything together until it forms a thick, spreadable paste. This peanut butter fudge mixture is what gives the Buster Bar its signature flavor and satisfying chew.
Assembling the Ultimate Buster Bar
Once your ice cream layer is completely frozen and solid, it’s time to add the peanut butter fudge topping. Carefully spread the thick peanut butter mixture evenly over the frozen ice cream layer. Again, aim for an even distribution to ensure every bite is a perfect balance of flavors and textures. Once the peanut butter layer is spread, we need to get this back into the freezer. This layer needs to firm up for at least another hour, or until it’s quite firm to the touch. This is crucial for the next step – the chocolate coating.
The Irresistible Chocolate Shell
The final touch that makes this dessert truly sing is the rich chocolate shell. In a medium saucepan, combine the semi-sweet chocolate chips, the remaining 1/2 cup of butter, and the evaporated milk. Heat this mixture over low heat, stirring constantly, until the chocolate chips and butter are completely melted and the mixture is smooth and glossy. You can also do this in a microwave-safe bowl, heating in 30-second intervals and stirring in between, until smooth. The evaporated milk helps to create a wonderfully smooth and pourable chocolate ganache that hardens just enough to create that signature shell when it hits the cold dessert. Once your chocolate topping is ready and the peanut butter layer is firm, retrieve the pan from the freezer. Pour the warm chocolate mixture over the peanut butter layer and spread it quickly and evenly to coat the entire surface. Work relatively fast, as the cold dessert will start to set the chocolate immediately.
Chilling and Serving Your Buster Bar Masterpiece
After the chocolate shell has been applied, return the Buster Bar Ice Cream Dessert to the freezer. This final chilling period is essential for everything to meld together perfectly and for the chocolate to harden into that satisfying shell. Allow it to freeze for at least another 2-3 hours, or preferably overnight. This ensures the dessert is firm and sliceable. When you’re ready to serve, let the entire pan sit at room temperature for about 5-10 minutes before cutting. This will make slicing much easier and prevent the chocolate from shattering too much. Cut into squares, and behold your homemade Buster Bar Ice Cream Dessert. Enjoy this delicious blast from the past!
Conclusion:
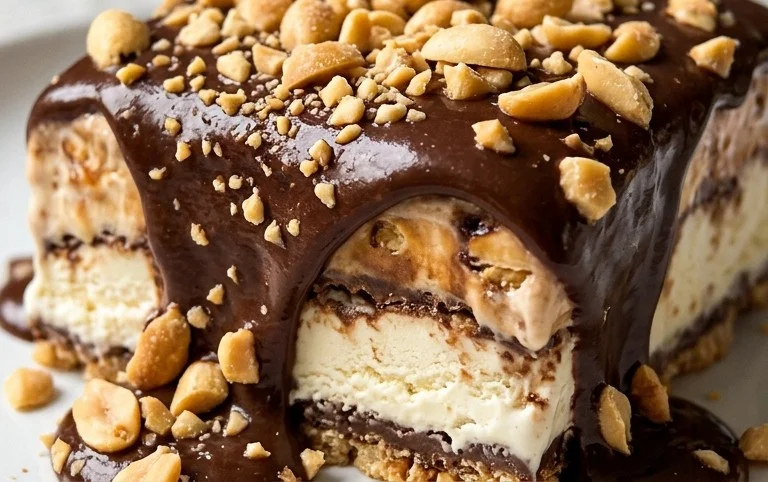
So there you have it – your guide to creating the most sensational Buster Bar Ice Cream Dessert right in your own kitchen! This recipe is truly a winner because it captures all the nostalgic, irresistible flavors of the classic treat in a way that’s surprisingly easy to achieve. The perfect balance of creamy ice cream, crunchy chocolate coating, and that delightful peanut butter core makes every bite an experience. It’s not just a dessert; it’s a happy memory in the making!
For serving suggestions, I love cutting this Buster Bar Ice Cream Dessert into thick slices and serving it immediately for that signature melty, yet firm, texture. It’s absolutely divine on its own, but a drizzle of extra hot fudge or a dollop of whipped cream can elevate it even further. For variations, don’t be afraid to get creative! You could try different ice cream flavors like mint chocolate chip or cookie dough. Swapping out the peanut butter center for a caramel swirl or even a jam filling are also fantastic ideas. The possibilities are endless!
I genuinely encourage you to give this Buster Bar Ice Cream Dessert a try. It’s a fun project for a weekend, a crowd-pleaser for gatherings, or just a delightful way to treat yourself. You’ll be amazed at how simple it is to create something so incredibly delicious. Get ready for rave reviews!
Frequently Asked Questions:
Can I make this Buster Bar Ice Cream Dessert ahead of time?
Absolutely! You can prepare the entire dessert and freeze it until firm. It’s best to let it sit at room temperature for about 10-15 minutes before slicing to ensure it’s easy to cut and still wonderfully cold.
What if I have a peanut allergy?
No problem at all! You can easily adapt this recipe by substituting the peanut butter layer with a sunflower seed butter, tahini, or even a rich chocolate ganache. Just ensure your chosen alternative is firm enough to hold its shape when frozen.
How do I get a really smooth chocolate coating?
To achieve a smooth and even chocolate coating, melt your chocolate chips and oil gently using a double boiler or in the microwave in short intervals, stirring frequently. Pouring the melted chocolate over a chilled dessert will help it set quickly and beautifully.
Buster Bar Ice Cream Dessert
A delicious and easy no-bake ice cream dessert featuring a crushed Oreo crust, creamy vanilla ice cream, crunchy peanuts, and a rich chocolate coating.
Ingredients
-
1 14.3 oz pkg. of Oreo cookies, crushed
-
1/2 C butter, melted
-
1/2 gal. vanilla ice cream, softened
-
1 lb. Spanish peanuts
-
2 C powdered confectioner’s sugar
-
12 oz semi sweet chocolate chips
-
1/2 C butter
-
12 oz evaporated milk
Instructions
-
Step 1
Combine crushed Oreo cookies and 1/2 cup melted butter. Press evenly into the bottom of a 9×13 inch baking pan. -
Step 2
Spread softened vanilla ice cream evenly over the cookie crust. -
Step 3
Sprinkle Spanish peanuts evenly over the ice cream layer. -
Step 4
In a saucepan, melt 1/2 cup butter. Stir in powdered confectioner’s sugar, semi sweet chocolate chips, and evaporated milk. Cook over low heat, stirring constantly, until chocolate is melted and the mixture is smooth and pourable. Avoid boiling. -
Step 5
Pour the warm chocolate mixture evenly over the peanut layer, ensuring it is completely covered. -
Step 6
Freeze for at least 4 hours, or until firm. Cut into squares and serve immediately.
Important Information
Nutrition Facts (Per Serving)
It is important to consider this information as approximate and not to use it as definitive health advice.
Allergy Information
Please check ingredients for potential allergens and consult a health professional if in doubt.