Cherries in the Snow- Delicious Winter Dessert Recipe
Cherries in the Snow isn’t just a dessert; it’s a whispered invitation to a winter wonderland, a nostalgic embrace of pure, unadulterated joy. Have you ever dreamt of capturing the essence of a crisp, starlit night, dusted with fresh powder, and transforming it into something utterly delicious? That’s precisely the magic this enchanting dish conjures. It’s a dessert that has captivated hearts for generations, a testament to the simple brilliance of combining tart, vibrant cherries with a creamy, dreamy, snowy topping. We love Cherries in the Snow because it’s a delightful paradox – the bright burst of fruit against the cool, sweet stillness of its snowy mantle creates an unforgettable sensory experience. It’s more than just a sweet treat; it’s a feeling, a memory, a celebration of comfort and elegance all rolled into one. Get ready to discover the secret behind this timeless delight.
Ingredients:
Creating Cherries in the Snow
This “Cherries in the Snow” dessert is a wonderfully simple yet elegant treat that’s perfect for any occasion. It requires minimal effort and delivers maximum flavor and visual appeal. Imagin extracte a light and airy angel food cake base, enveloped in a creamy, dreamy topping, and crowned with a cascade of vibrant cherry filling. It’s a classic for a reason, and once you try it, you’ll understand why it’s a crowd-pleaser. The beauty of this recipe lies in its simplicity, relying on a few key ingredients to create something truly special. Let’s dive in and create this delightful dessert.
Preparing the Creamy Base
The foundation of our “Cherries in the Snow” is a luscious, creamy mixture that perfectly complements the sweet cherries and the delicate angel food cake. This step is all about achieving a smooth, lump-free texture for the ultimate indulgence.
1. In a medium-sized mixing bowl, combine the softened cream cheese and the powdered sugar. It’s crucial that the cream cheese is at room temperature; this ensures it whips up smoothly without any lumps. If your cream cheese is still firm, you can warm it slightly by placing it in a microwave for about 15-20 seconds, but be careful not to melt it. Beat these two ingredients together with an electric mixer on medium speed until they are well combined and fluffy. Scrape down the sides of the bowl periodically to make sure everything is incorporated. This initial creaming step is vital for a smooth final texture.
2. Gradually add the 1/2 cup of 2% milk to the cream cheese and powdered sugar mixture. Continue to beat on medium speed until the mixture is completely smooth and pourable. You want a consistency that’s easy to spread but not too thin. If it seems a little too thick, you can add a tablespoon of milk at a time, but be cautious not to make it watery. This creamy layer will be the sweet embrace for our angel food cake.
3. Gently fold in the thawed Cool Whip whipped topping. It’s important that the Cool Whip is fully thawed but not melted. You can achieve this by leaving it in the refrigerator overnight or by placing the container in a bowl of cool water for about 30 minutes. When folding, use a spatula and a light hand. You want to incorporate the Cool Whip without deflating the air that gives it its lightness. The goal is to create a uniform, fluffy mixture with no streaks of cream cheese or Cool Whip visible. This creates the airy, cloud-like texture that is characteristic of this dessert.
Assembling the Dessert
Now comes the fun part: bringin extractg all the elements together to create the stunning “Cherries in the Snow.” The visual appeal of this dessert is almost as good as its taste, with the vibrant red cherries peeking through the white topping.
4. Prepare your serving dish. A 9×13 inch baking dish or a trifle bowl works wonderfully for this dessert, allowing you to showcase the layers. If you’re using a trifle bowl, the visual effect will be even more dramatic. Take your pre-baked 9-inch angel food cake and carefully tear or cut it into bite-sized pieces. There’s no need to be precise here; rustic pieces will add to the charm. Arrange these angel food cake pieces in an even layer at the bottom of your chosen serving dish. This will be the soft, absorbent base for our creamy topping and cherry filling.
5. Pour the prepared cream cheese and Cool Whip mixture evenly over the angel food cake layer. Use a spatula to gently spread it, ensuring it covers all the cake pieces. You want a nice, thick layer of this creamy goodness. Try to get it as even as possible for a consistent texture in every bite. This creamy layer acts as a delicious binder and adds a rich, yet light, flavor that is essential to the overall profile of the dessert.
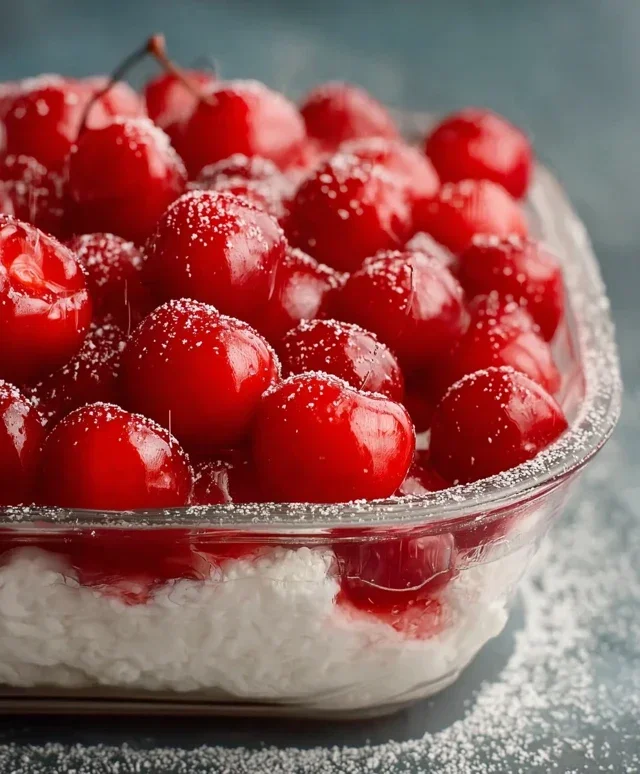
6. Now for the star of the show: the cherry pie filling. Open both cans of cherry pie filling. You don’t need to drain them; the syrup is part of the flavor and texture. Spoon generous dollops of the cherry pie filling over the creamy topping. You can either spread it into a more uniform layer or create more of a marbled effect by placing spoonfuls in different areas. The goal is to have plenty of bright red cherries distributed throughout the dessert, creating those beautiful “snow-kissed” moments. Don’t be shy with the cherries; they are what give this dessert its name and its signature flavor burst.
Chill and Serve
For the best flavor and texture, chilling is essential. This allows the flavors to meld together and the dessert to set up nicely.
7. Cover the serving dish tightly with plastic wrap or a lid. Refrigerate the “Cherries in the Snow” for at least 4 hours, or preferably overnight. This chilling period is crucial. It allows the angel food cake to absorb some of the moisture from the creamy topping and cherry filling, making it wonderfully moist and tender. It also allows the creamy mixture to firm up slightly, making the dessert easier to serve. The flavors will deepen and harmonize beautifully during this time, resulting in a truly delicious and satisfying dessert. When you’re ready to serve, you can garnish with a few extra maraschino cherries or a sprig of mint if you desire, though it’s absolutely divine just as it is. Enjoy this simple yet spectacular dessert!
Conclusion:
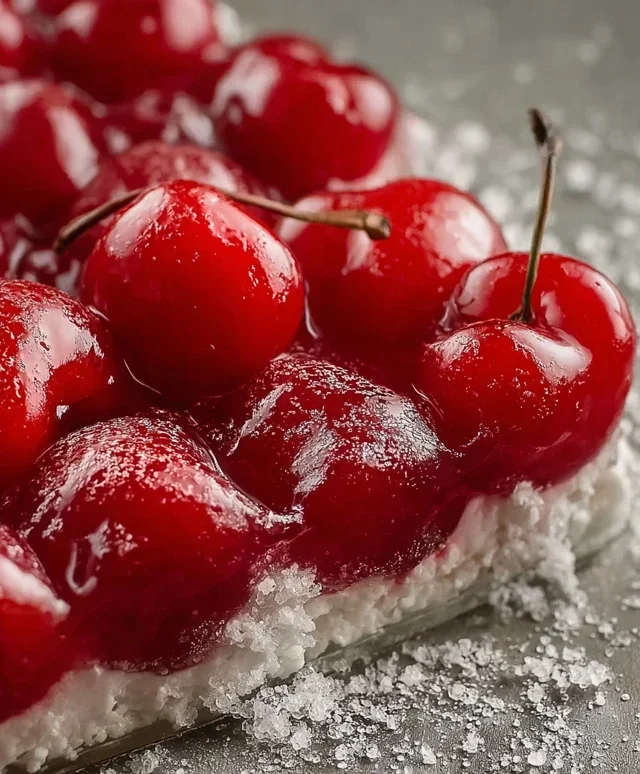
I hope you’re as excited as I am to try this delightful ‘Cherries in the Snow’ recipe! This dessert is truly a showstopper, offering a perfect balance of sweet, tart cherries nestled within a light, snowy meringue. It’s incredibly rewarding to create something so visually stunning and delicious, and it’s surprisingly straightforward, making it accessible for bakers of all levels. The interplay of textures – the crisp meringue giving way to the juicy burst of cherries – is simply divine. I find it’s wonderful served chilled, allowing the flavors to meld beautifully.
For serving suggestions, I love presenting ‘Cherries in the Snow’ as a sophisticated after-dinner treat. It pairs wonderfully with a dollop of freshly whipped cream or a scoop of vanilla bean ice cream. If you’re feeling adventurous, consider a light dusting of powdered sugar for an extra touch of elegance. As for variations, don’t be afraid to experiment! You could try incorporating a hint of almond extract into the meringue for a nutty depth, or perhaps add a splash of Kirsch Extract to the cherry mixture for a grown-up twist. Really, the possibilities are endless!
I truly encourage you to give this recipe a go. It’s a fantastic way to impress guests or simply treat yourself to something special. The joy of creating and sharing this beautiful dessert is immense.
Frequently Asked Questions:
Can I use frozen cherries instead of fresh?
Yes, you absolutely can use frozen cherries! Ensure they are thawed and drained thoroughly to avoid excess moisture affecting the meringue. You might need to adjust the cooking time slightly, so keep an eye on them.
What’s the best way to store Cherries in the Snow?
For the best texture, it’s ideal to store ‘Cherries in the Snow’ in an airtight container in the refrigerator. It’s best enjoyed within 2-3 days, as the meringue can soften over time.
Is there a way to make this dairy-free?
The meringue itself is dairy-free. If you plan to serve it with whipped cream, you can easily substitute with a dairy-free whipped topping made from coconut cream or soy for a completely dairy-free experience.
Cherries in the Snow
A classic no-bake dessert featuring layers of creamy filling, sweet cherry topping, and light angel food cake. Perfect for potlucks and holidays.
Ingredients
-
8 ounces cream cheese, room temperature
-
1/2 cup powdered sugar
-
1/2 cup 2% milk
-
12 ounces Cool Whip whipped topping, thawed
-
1 pre-baked 9-inch angel food cake
-
2 cans cherry pie filling (21 ounces each)
Instructions
-
Step 1
In a large bowl, beat the softened cream cheese with powdered sugar until smooth. -
Step 2
Gradually add the 2% milk and beat until well combined and creamy. -
Step 3
Gently fold in the thawed Cool Whip whipped topping until no streaks remain. -
Step 4
Cut the angel food cake into bite-sized cubes. -
Step 5
In a 9×13 inch baking dish, spread half of the angel food cake cubes evenly across the bottom. -
Step 6
Spread half of the cream cheese mixture over the cake cubes. -
Step 7
Pour one can of cherry pie filling over the cream cheese layer. -
Step 8
Repeat the layers with the remaining angel food cake cubes, cream cheese mixture, and the second can of cherry pie filling. -
Step 9
Cover and refrigerate for at least 2 hours before serving.
Important Information
Nutrition Facts (Per Serving)
It is important to consider this information as approximate and not to use it as definitive health advice.
Allergy Information
Please check ingredients for potential allergens and consult a health professional if in doubt.