Cheesecake Fruit Salad Roll Ups- Easy & Delicious Recipe
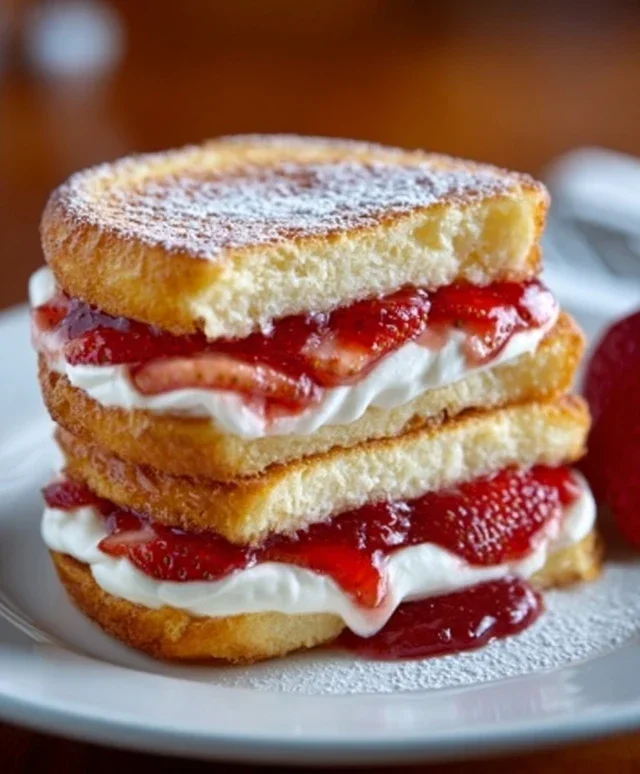
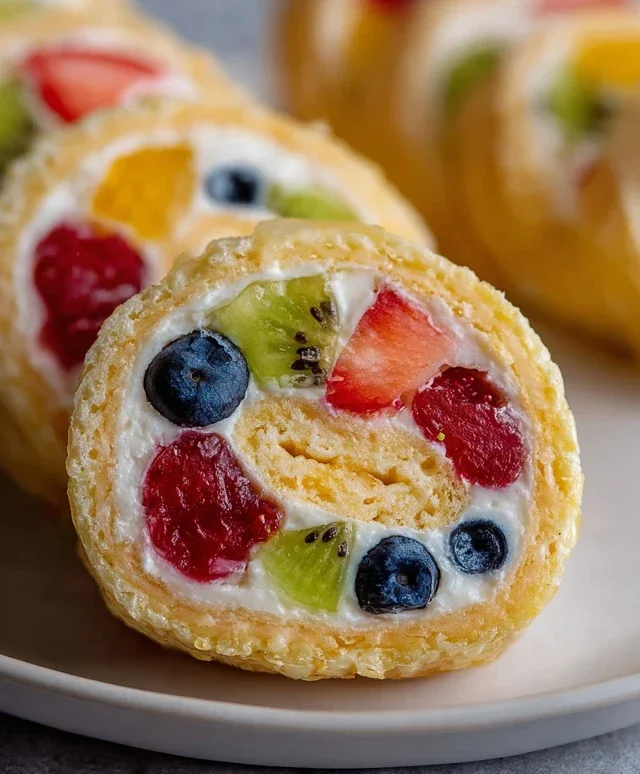
Cheesecake Fruit Salad Roll Ups are about to become your new obsession! Forget everything you thought you knew about fruit salad; this is a playful, vibrant, and utterly delightful twist that will have everyone asking for the recipe. We all love the creamy, tangy goodness of cheesecake, and who can resist the refreshing burst of fresh fruit? What makes these Cheesecake Fruit Salad Roll Ups so incredibly special is the ingenious way we combine these beloved elements. Imagin extracte a luscious, no-bake cheesecake filling swirled with a knon-alcoholic aleidoscope of seasonal fruits, all neatly rolled up in a soft, pliable tortilla. It’s a party in every bite, a perfect balance of sweet, tart, and creamy, and the fun, portable format makes them ideal for picnics, potlucks, or just a special treat to brighten your day. Get ready for a dessert that’s as beautiful as it is delicious!

Cheesecake Fruit Salad Roll Ups
Get ready for a delightful treat that’s surprisingly easy to make and absolutely bursting with flavor! These Cheesecake Fruit Salad Roll Ups are a fantastic way to enjoy the creamy richness of cheesecake paired with the vibrant sweetness of fresh fruit, all wrapped up in a convenient and portable tortilla. They’re perfect for a fun breakfast, a light dessert, or even a festive snack for gatherings. The combination of textures and tastes is simply divine, and you’ll find yourself making these again and again. Let’s dive into creating these delicious roll-ups!
Ingredients:
Preparing the Creamy Cheesecake Filling
The heart of our roll-ups is a luscious cheesecake-inspired filling. It’s a simple no-bake mixture that comes together in minutes, and it’s the perfect creamy base for our fruity goodness.
1. In a medium-sized mixing bowl, combine the softened cream cheese and ½ cup of the room temperature unsalted butter. Use an electric mixer or a sturdy whisk to beat them together until they are smooth and creamy. It’s important that both the butter and cream cheese are at room temperature; this ensures they blend seamlessly without any lumps, giving you the silkiest filling possible. If they are too cold, you’ll end up with a lumpy mixture, which we definitely want to avoid.
2. Gradually add the 1 ½ cups of powdered sugar to the cream cheese and butter mixture. Continue mixing on low speed at first, then increase to medium speed. Beat until the mixture is light, fluffy, and well combined. This process incorporates air, making the filling wonderfully airy and decadent.
3. Stir in the 1 teaspoon of vanilla extract. This adds a classic, comforting flavor that complements both the cheesecake base and the fresh fruit.
4. Now, gently fold in the 1 ¼ cups of whipped cream. If you’re using the heavy cream option, first whip the chilled heavy cream with the 2.5 tablespoons of powdered sugar until stiff peaks form, then carefully fold it into the cream cheese mixture. Folding is key here – you want to incorporate the whipped cream without deflating it, which will keep the filling light and fluffy. This step is what gives our filling its airy, cloud-like texture, reminiscent of real cheesecake.
Assembling the Fruit Salad
While the filling is the creamy star, the fruit salad brings the freshness and vibrant color. We want to prepare the fruit in a way that maximizes its flavor and texture within the roll-up.
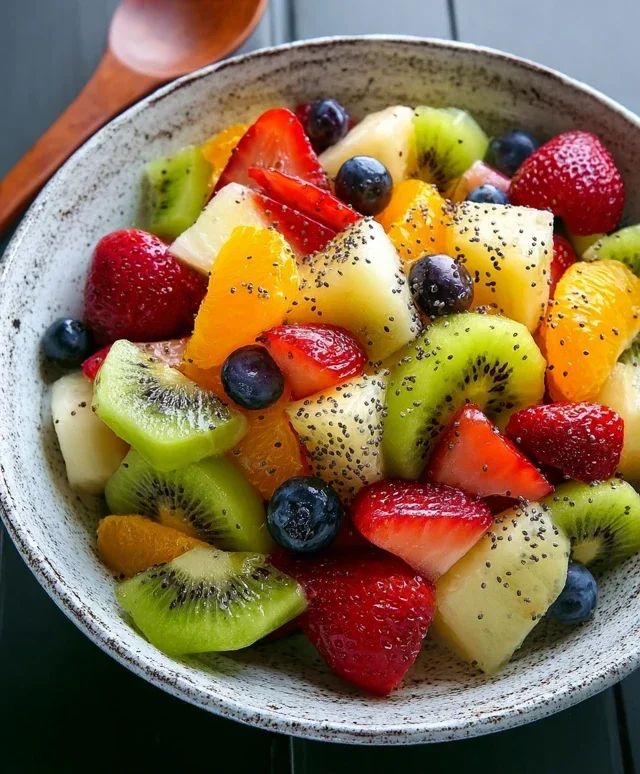
1. In a separate bowl, combine all your prepared fresh fruits: the 2/3 cup of fresh blueberries, 2/3 cup of small diced fresh strawberries, 3 small peeled and diced peaches, 2 peeled and small diced kiwis, and ½ cup of fresh raspberries, sliced in half. Gently toss them together to distribute the colors and flavors evenly. Avoid overmixing, especially with the delicate raspberries, to prevent them from becoming mushy. The variety of fruits ensures a delightful mix of sweet, tart, and juicy elements in every bite.
Bringin extractg It All Together: The Roll-Up Magic
This is where the fun truly begin extracts! We’ll combine our creamy filling, fresh fruit, and a secret ingredient for an extra layer of deliciousness.
1. In a clean bowl, whisk together the two (1 oz) boxes of sugar-free vanilla instant pudding powder with about ¼ cup of cold water. You just want to moisten the powder to create a thick paste. This might seem a little unusual, but trust me, it’s a fantastic trick! The pudding mix acts as a stabilizer and binder for the fruit, preventing too much moisture from making our tortillas soggy. It also adds a subtle hint of vanilla that enhances the overall flavor profile. Set this aside for a moment.
2. Now, gently fold the prepared fruit salad into the cheesecake filling mixture. Be careful not to overmix. You want distinct pieces of fruit visible throughout the creamy filling.
3. Next, carefully fold in the pudding paste mixture. Again, fold gently until it’s just combined. You’re looking for a cohesive mixture that holds together well but still has plenty of visible fruit.
Creating the Crispy Tortilla Shells
For that extra touch of decadence and a delightful textural contrast, we’re going to give our tortillas a quick, sweet, and crispy finish.
1. Lay out your 4–5 large tortillas on a clean surface.
2. In a small bowl, combine the 2–3 tablespoons of melted unsalted butter with the ½ cup of sugar and 1 teaspoon of cinnamon (or more, if you love cinnamon!). Stir this mixture well until the sugar is evenly distributed in the melted butter and cinnamon. This will be our glaze.
3. Lightly brush one side of each tortilla with this cinnamon-sugar butter mixture. Don’t drench them, just a nice even coating. This is the side that will be facing outwards when you roll them up, ensuring a beautiful golden-brown, slightly crispy exterior.
Rolling and Baking (or Chilling!)
Now we assemble and prepare to enjoy! You have two fantastic options for the final stage: a warm, slightly crispy treat or a perfectly chilled dessert.
1. Spread a generous amount of the cheesecake fruit salad filling evenly over the glazed side of each tortilla, leaving about an inch border around the edges. Don’t overfill, or it will be difficult to roll neatly.
2. Carefully roll up each tortilla, starting from one edge and rolling tightly. Try to tuck in the sides as you go to create a neat little package.
3. For a warm, crispy treat: Place the rolled tortillas seam-side down on a baking sheet. Brush the tops with any remaining cinnamon-sugar butter mixture. Bake in a preheated oven at 350°F (175°C) for about 8-10 minutes, or until the tortillas are lightly golden and slightly crisp. Keep a close eye on them as they can brown quickly.
4. For a chilled, no-bake treat: You can skip the baking step. Once rolled, you can either serve them immediately, or for a firmer result, wrap them tightly in plastic wrap and chill them in the refrigerator for at least 30 minutes. This allows the filling to set up a bit more and makes them easier to slice cleanly.
These Cheesecake Fruit Salad Roll Ups are a delightful invention. They offer all the comfort of cheesecake and the freshness of fruit in a fun, easy-to-handle format. Enjoy every delicious bite!
Conclusion:
And there you have it – the delightfully simple yet incredibly impressive Cheesecake Fruit Salad Roll Ups! I truly believe this recipe is a winner because it perfectly balances that creamy, tangy cheesecake filling with the vibrant freshness of mixed fruits, all wrapped up in a convenient and fun package. It’s a fantastic dessert or snack that’s surprisingly easy to make, making it ideal for busy weeknights or for impressing guests at your next gathering. The visual appeal alone is stunning, and the taste? Absolutely divine!
These roll ups are wonderfully versatile. Serve them chilled for a refreshing treat, perhaps alongside a cup of coffee or tea. They make for a perfect addition to a brunch spread, a delightful picnic dessert, or even as a lighter option after a rich meal. Don’t be afraid to get creative with your fruit choices – berries, kiwi, mango, and even finely diced apples would all work beautifully. For an extra touch, consider a drizzle of chocolate sauce or a sprinkle of toasted coconut.
I wholeheartedly encourage you to give these Cheesecake Fruit Salad Roll Ups a try. They are a guaranteed crowd-pleaser and a testament to how simple ingredients can come together to create something truly special. I can’t wait to hear about your own delicious creations!
Frequently Asked Questions:
Can I make these ahead of time?
Yes, absolutely! You can prepare the cheesecake filling and chop your fruits up to a day in advance. However, I recommend assembling the roll ups closer to serving time to ensure the wrappers remain crisp and the fruit stays fresh and doesn’t make the wrappers soggy.
What kind of wraps work best?
I find that standard flour tortillas work very well. You could also experiment with other types of flatbreads, but they might have a slightly different texture. Make sure they are fresh and pliable for the best rolling experience.
Can I substitute the cream cheese?
While cream cheese provides that classic cheesecake tang, you could try using a thick Greek yogurt for a lighter version, or even mascarpone for a richer taste. Just ensure whatever you use is quite firm and not too watery.
Cheesecake Fruit Salad Roll Ups
A delightful and refreshing dessert combining the creamy tang of cheesecake with a vibrant medley of fresh fruits, all rolled up in a soft tortilla. Perfect for a light treat or a festive gathering.
Ingredients
-
1 ½ cups powdered sugar
-
6 oz cream cheese, room temperature
-
1 teaspoon vanilla extract
-
1 ¼ cups whipped cream
-
2/3 cup fresh blueberries
-
2/3 cup small diced fresh strawberries
-
3 small peaches, peeled and diced
-
2 kiwis, peeled and small diced
-
½ cup fresh raspberries, sliced in half
-
2 (1 oz) boxes sugar-free vanilla instant pudding
-
4–5 large tortillas, room temperature
-
2–3 tablespoons unsalted butter, melted
-
½ cup sugar
-
1 teaspoon cinnamon
Instructions
-
Step 1
In a large bowl, beat together the powdered sugar, cream cheese, and vanilla extract until smooth and creamy. -
Step 2
Gently fold in the whipped cream until fully incorporated. Set aside the cheesecake filling. -
Step 3
In a separate bowl, combine the prepared fresh blueberries, diced strawberries, diced peaches, diced kiwis, and halved raspberries. This is your fruit salad. -
Step 4
Prepare the sugar-free vanilla instant pudding according to package directions, using water. Once prepared, let it cool slightly and then gently fold it into the fruit salad mixture. -
Step 5
Lay out one large tortilla. Spread a generous layer of the cheesecake filling over the tortilla, leaving a small border around the edges. -
Step 6
Spoon a portion of the fruit salad and pudding mixture down the center of the cheesecake-covered tortilla. -
Step 7
Carefully roll up the tortilla, tucking in the sides as you go, to create a neat roll-up. Repeat with the remaining tortillas and filling. -
Step 8
In a small bowl, combine the melted butter, sugar, and cinnamon. Brush the tops of the roll-ups with this mixture. -
Step 9
Serve immediately or chill for a short period before enjoying.
Important Information
Nutrition Facts (Per Serving)
It is important to consider this information as approximate and not to use it as definitive health advice.
Allergy Information
Please check ingredients for potential allergens and consult a health professional if in doubt.