Fruity Pebbles Cheesecake Tacos – Sweet Crunchy Fun
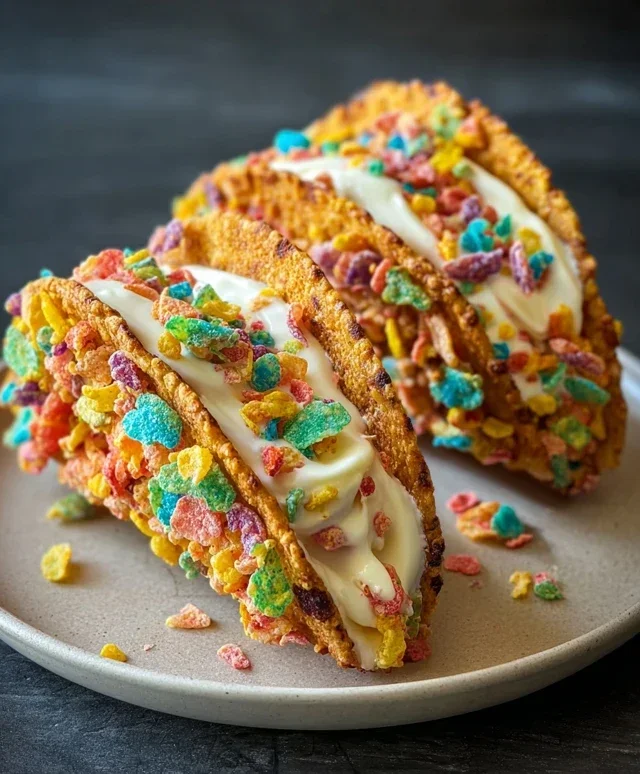
Fruity Pebbles Cheesecake Tacos are about to become your new obsession, and I can’t wait to share this vibrant, flavor-packed recipe with you! Imagin extracte the creamy, dreamy indulgence of cheesecake meeting the playful crunch and rainbow hues of your favorite childhood cereal, all nestled in a delightful taco shell. It’s a dessert mashup that sounds wild, I know, but trust me, it’s pure magic on a plate. People absolutely adore these Fruity Pebbles Cheesecake Tacos because they tap into a sense of nostalgic joy while delivering a sophisticated yet incredibly fun dessert experience. What truly makes them special is the unexpected yet harmonious marriage of textures and tastes: the smooth, tangy cheesecake filling, the crisp, sweet taco shell, and the sweet, fruity bursts from the iconic cereal topping. Get ready to wow your taste buds and your friends!
Fruity Pebbles Cheesecake Tacos
Get ready for a flavor explosion that will transport you straight to a land of pure sugary delight! These Fruity Pebbles Cheesecake Tacos are a playful and incredibly delicious dessert that’s surprisingly easy to make. Imagin extracte the vibrant colors and sweet crunch of Fruity Pebbles transformed into a crispy taco shell, cradling a creamy, dreamy cheesecake filling, all topped with a swirl of whipped cream and even more cereal. They’re perfect for parties, a fun family activity, or just when you need a serious dose of joy in dessert form. We’re taking a classic cheesecake and giving it a fun, kid-friendly makeover that adults will adore just as much. Forget boring old cheesecake squares; these tacos are a textural masterpiece and a visual treat!
Ingredients:
Creating the Crispy Taco Shells
The magic of these tacos begin extracts with transforming our beloved Fruity Pebbles into edible shells. This step is where we add that satisfying crunch and vibrant color.
1. Prepare the Cereal Mixture: In a large mixing bowl, combine 2 cups of the colorful fruity cereal with the 1/2 cup of melted unsalted butter. Gently stir with a spatula until the cereal is evenly coated with the butter. You want every single piece to have a glossy sheen. This butter acts as a binder, helping the cereal stick together and creating a sturdy shell once cooled. Allow this mixture to sit for about 5 minutes, giving the cereal a chance to absorb some of the butter, which will make it easier to mold.
2. Forming the Taco Shapes: Preheat your oven to 300°F (150°C). This lower temperature is crucial for allowing the cereal mixture to set without burning. Lightly grease a baking sheet or line it with parchment paper. Now, for the fun part: shaping! You can use a taco shell mold if you have one, or get creative. I like to press the cereal mixture into small, slightly curved shapes on the baking sheet, resembling mini taco shells. You can also form them around the outside of small, oven-safe ramekins or muffin tin liners if you want a more defined curve. Work quickly but gently, pressing the cereal firmly to create compact shells. Don’t worry if they aren’t perfectly uniform; a rustic look is part of their charm!
3. Baking the Shells: Place the baking sheet in the preheated oven and bake for 8-10 minutes, or until the edges are lightly golden and the shells feel firm to the touch. Keep a close eye on them, as cereal can go from perfectly toasted to burnt very quickly. The goal is to set the butter and toast the cereal just enough to make it hold its shape. Once baked, carefully remove the baking sheet from the oven and let the shells cool completely on the baking sheet. As they cool, they will become delightfully crispy and brittle, ready to hold our delicious filling.
Whipping Up the Creamy Cheesecake Filling
While our taco shells are cooling, it’s time to prepare the luscious cheesecake filling. This is the smooth, creamy counterpart to our crunchy shells.
4. Making the Cheesecake Base: In a medium mixing bowl, combine the 8 oz of softened cream cheese, 1/2 cup of sifted powdered sugar, and 1 tsp of pure vanilla extract. Using an electric mixer on medium speed, beat these ingredients together until the mixture is completely smooth and creamy, with no lumps of cream cheese remaining. Sifting the powdered sugar is key here to avoid any grittiness in your filling. Scrape down the sides of the bowl periodically to ensure everything is incorporated. Taste it and adjust sweetness if you desire, though it’s perfectly balanced as is.
5. Folding in the Whipped Cream: Once the cream cheese mixture is smooth and homogenous, gently fold in the 1 cup of whipped cream. Use a spatula and a light hand to incorporate the whipped cream without deflating it. You want to maintain that airy lightness. The goal is to create a smooth, luscious, and light cheesecake filling that’s not too dense. This step will make the filling wonderfully spoonable and spreadable.
Assembling Your Fruity Pebbles Cheesecake Tacos
Now for the grand finnon-alcoholic ale – putting it all together! This is where the vibrant colors and delicious flavors truly come to life.
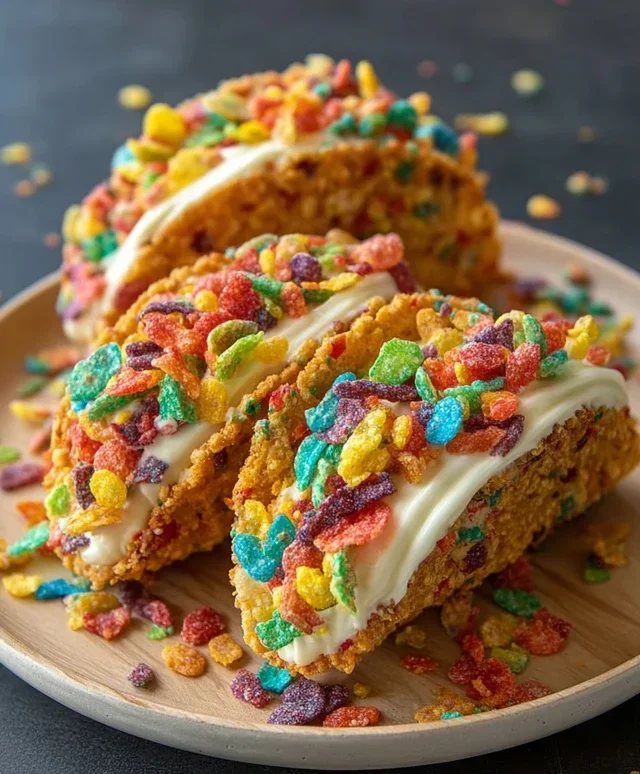
6. Filling and Garnishing: Carefully remove the cooled Fruity Pebbles taco shells from the baking sheet. If any have broken, don’t worry! You can always crush them up and sprinkle them over the top as a garnish. Spoon or pipe the creamy cheesecake filling into each taco shell. Don’t overfill them, or the filling might spill out. For an extra touch of fun and flavor, sprinkle the tops of the filled tacos with the remaining 1 cup of colorful fruity cereal. You can also add a dollop of extra whipped cream on top of each taco for an extra decadent finish.
These Fruity Pebbles Cheesecake Tacos are a delightful way to enjoy the classic flavors of cheesecake in a fun, portable, and visually stunning package. They’re a guaranteed hit and a fantastic way to bring a little bit of playful magic to any occasion. Enjoy every crunchy, creamy, fruity bite!
Conclusion:
There you have it – a delightful recipe for Fruity Pebbles Cheesecake Tacos that’s guaranteed to bring smiles and a burst of flavor to any occasion! This recipe is fantastic because it cleverly combines the creamy indulgence of cheesecake with the fun, whimsical crunch of Fruity Pebbles, all wrapped up in a convenient and portable taco shell. It’s the perfect blend of sweet, tangy, and satisfyingly crunchy textures, making it a truly memorable dessert experience. These treats are incredibly versatile; serve them at birthday parties, as a fun dessert after a casual dinner, or even as a special weekend treat. I love to top mine with a dollop of whipped cream and a few extra sprinkles for that extra pizzazz!
Don’t be afraid to experiment! You can easily swap out the Fruity Pebbles for other colorful cereals, or add a swirl of fruit puree into the cheesecake filling for a different flavor profile. Perhaps a sprinkle of chopped nuts or a drizzle of chocolate sauce would elevate your Fruity Pebbles Cheesecake Tacos even further. I truly encourage you to give this recipe a try. It’s surprisingly easy to make and the joy it brings is absolutely worth it. Get ready to wow your friends and family with this unique and utterly delicious dessert!
Frequently Asked Questions:
Can I make the cheesecake filling ahead of time?
Absolutely! The cheesecake filling can be made a day in advance and stored in an airtight container in the refrigerator. This makes assembling the tacos on the day of serving even quicker and easier.
What kind of taco shells work best?
For this recipe, hard taco shells are ideal as they provide a sturdy base that won’t get soggy. You can also use mini waffle cones or even crisp cookie cups if you want a different presentation.
Are there any gluten-free options for this recipe?
Yes! You can use gluten-free hard taco shells. For the cereal, many brands offer gluten-free Fruity Pebbles alternatives, or you can experiment with other gluten-free cereals that have a similar flavor and texture.
Fruity Pebbles Cheesecake Tacos
A fun and colorful dessert taco featuring a creamy Fruity Pebbles cheesecake filling in a crispy cereal shell, topped with whipped cream and extra cereal.
Ingredients
-
3 cups colorful fruity cereal
-
1/2 cup unsalted butter, melted
-
8 oz cream cheese, softened
-
1/2 cup powdered sugar, sifted
-
1 tsp pure vanilla extract
-
1 cup whipped cream
-
Additional fruity cereal for garnish
Instructions
-
Step 1
Line a baking sheet with parchment paper. In a bowl, combine 3 cups of colorful fruity cereal with 1/2 cup of melted unsalted butter. Stir until evenly coated. -
Step 2
Press the cereal mixture into the bottom of 6 small bowls or taco molds, forming taco shells. Chill in the refrigerator for at least 10 minutes to set. -
Step 3
In a separate bowl, beat 8 oz of softened cream cheese with 1/2 cup of sifted powdered sugar until smooth and creamy. -
Step 4
Stir in 1 tsp of pure vanilla extract into the cream cheese mixture until well combined. -
Step 5
Gently fold in 1 cup of whipped cream into the cream cheese mixture until just incorporated. -
Step 6
Carefully remove the cereal taco shells from their molds. Spoon the cheesecake filling into each taco shell. -
Step 7
Garnish each taco with additional fruity cereal before serving.
Important Information
Nutrition Facts (Per Serving)
It is important to consider this information as approximate and not to use it as definitive health advice.
Allergy Information
Please check ingredients for potential allergens and consult a health professional if in doubt.