Easy Japanese Tuna Onigiri Quick Recipe
15-min. Easy Japanese Tuna Onigiri is your new go-to for a quick, satisfying, and utterly delightful meal or snack. In our busy lives, finding delicious food that doesn’t demand hours in the kitchen can feel like a treasure hunt. Well, consider this recipe your discovery! Japanese tuna onigiri, those perfectly formed rice balls, are beloved for their comforting simplicity and incredible versatility. What makes this particular 15-min. easy Japanese tuna onigiri so special is the perfect balance of savory tuna, fluffy rice, and a hint of oceanic goodness that comes together in mere minutes. It’s the ideal solution for a rushed lunch, a light dinner, or even a satisfying midnight craving. Prepare to be amazed at how something so easy can taste so incredibly good!
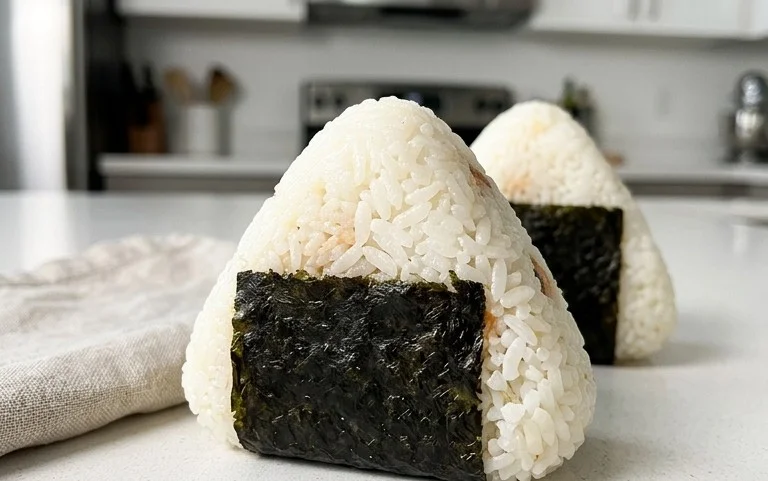
15-Min. Easy Japanese Tuna Onigiri
There are some days when the craving for something delicious and satisfying hits, but the energy to cook a full meal just isn’t there. On those days, my go-to solution is Japanese Tuna Onigiri. These delightful rice balls are incredibly simple to make, packed with flavor, and can be whipped up in just about 15 minutes, making them perfect for a quick lunch, a light dinner, or even a substantial snack. The combination of fluffy rice, savory tuna, and creamy mayonnaise is utterly irresistible, and the optional touch of sesame seeds adds a lovely nutty aroma. Plus, they’re so customizable – you can adjust the seasonings to your liking! Let’s get started on making these easy and delicious tuna onigiri.
Ingredients:
Preparing the Filling
The first step in creating our flavorful onigiri is to prepare the tuna filling. This is where we’ll infuse the rice with a burst of savory goodness.
1. Open the can of tuna and drain off most of the oil or water. You don’t need to get every last drop, as a little residual liquid can actually help bind the filling. Transfer the drained tuna to a small bowl. Use a fork to break up the tuna into small flakes. This will ensure that you get a good distribution of tuna throughout your onigiri.
2. Add the Japanese mayonnaise to the bowl with the flaked tuna. Japanese mayonnaise, like Kewpie, has a richer, tangier flavor than regular mayonnaise, which I find really enhances the taste of the onigiri. However, if you don’t have it, regular mayonnaise will work perfectly well. Stir everything together until the tuna is well coated in the mayonnaise. You want a creamy, cohesive mixture. At this stage, you can also add a tiny pinch of salt and pepper if you like, but taste it first as the tuna and mayo might already have enough.
Assembling the Onigiri
Now comes the fun part – shaping the rice! It’s a surprisingly simple process, and once you do it a couple of times, you’ll be a pro.
3. In a separate bowl, gently fluff the cooked short grain rice. Short grain rice is ideal for onigiri because its sticky nature helps the rice balls hold their shape. If you’re using leftover rice that has cooled down, gently reheat it until it’s warm but not steaming hot. Add the 1/2 teaspoon of salt to the warm rice and gently mix it in. You want the salt to distribute evenly, seasoning the rice throughout. It’s important not to overmix, as this can make the rice gummy.
4. Now it’s time to form the onigiri. Wet your hands with water to prevent the rice from sticking. This is a crucial step! You can also lightly sprinkle a bit of salt onto your palms after wetting them. Take about a quarter of the seasoned rice (this will depend on how large you want your onigiri to be) and place it in the palm of one hand. Create a small indentation in the center of the rice. Spoon about a tablespoon of the tuna filling into this indentation. Then, take another small amount of rice and place it over the filling to cover it. Gently begin extract to shape the rice around the filling, pressing lightly with your fingers to form a compact ball or triangle. You can use your palms to round out the shape, or form a classic triangle by pressing the sides against each other. Don’t press too hard, or the rice will become dense and heavy. The goal is to have a well-formed, but still tender, rice ball.
Finishing Touches
The final touches are what make our onigiri visually appealing and add an extra layer of flavor.
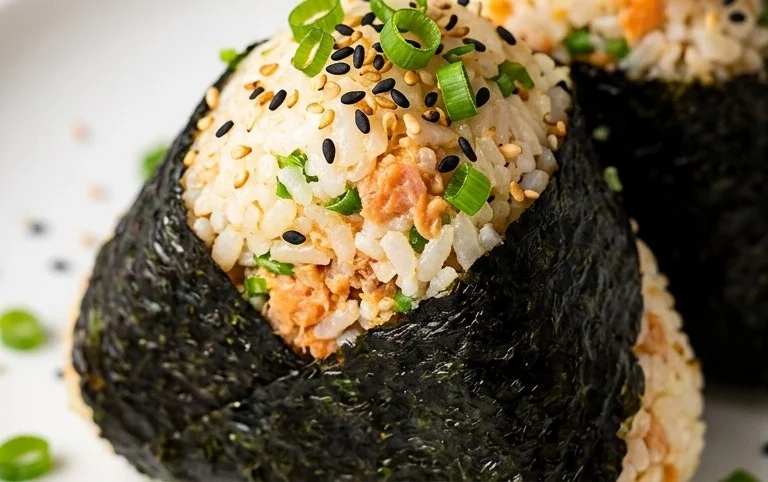
5. Prepare the nori. If you’re using full sheets, you can cut them into strips about 1 inch wide. These strips will be used to wrap around the onigiri. Place a shaped rice ball into the palm of your hand. Take a strip of nori and wrap it around the bottom or middle of the onigiri. The moisture from the rice will help the nori stick. If you are using only 1/2 sheet, you can tear off smaller pieces to decorate. For an extra touch, sprinkle the optional sesame seeds over the top of the onigiri. You can press them gently into the rice to help them adhere. Repeat the shaping and nori-wrapping process with the remaining rice and filling.
And there you have it! Delicious, homemade Japanese Tuna Onigiri, ready in about 15 minutes. These are best enjoyed fresh, while the rice is still warm and the nori is crisp. They are perfect for packing in lunchboxes, taking on picnics, or enjoying as a quick and satisfying meal at home. Experiment with different fillings next time – cooked salmon, seasoned kombu, or even some furikake can be delicious additions! Enjoy your culinary creation!
Conclusion:
And there you have it – your incredibly quick and delicious Japanese Tuna Onigiri, ready in just 15 minutes! This recipe is fantastic because it proves that you don’t need hours in the kitchen to enjoy authentic Japanese flavors. It’s perfect for busy weeknights, a satisfying lunch on the go, or even a simple yet impressive snack. The beauty of these rice balls lies in their versatility; they’re a blank canvas waiting for your personal touch.
I love serving these onigiri alongside a light miso soup, some pickled gin extractger, or a small salad. They also make a wonderful addition to a bento box. Don’t be afraid to experiment with different fillings! Think beyond tuna – cooked salmon, seasoned chicken, or even finely chopped sautéed vegetables can work wonders. You can also sprinkle in sesame seeds, furikake, or a dash of soy sauce to the rice itself for extra flavor. I truly encourage you to give this 15-min. Easy Japanese Tuna Onigiri a try; I’m confident you’ll be hooked!
Frequently Asked Questions:
Can I make the rice ahead of time?
Absolutely! You can cook your sushi rice in advance and let it cool to room temperature. It’s often easier to handle when it’s not piping hot, so preparing the rice a few hours ahead can actually make assembling the onigiri smoother.
What kind of tuna is best for onigiri?
Canned tuna packed in oil or water works perfectly. Just make sure to drain it very well before mixing it with your mayonnaise or other seasonings to avoid a mushy filling. Using tuna packed in oil can add a nice richness, but tuna in water is also a great option.
How should I store leftover onigiri?
While onigiri are best enjoyed fresh, you can store leftovers wrapped tightly in plastic wrap at room temperature for a few hours, or in the refrigerator for up to a day. Reheat them gently in a microwave or a lightly oiled pan if desired, though they are also quite tasty at room temperature.
15-min. Easy Japanese Tuna Onigiri
Quick and simple Japanese tuna onigiri, perfect for a speedy lunch or snack.
Ingredients
-
2 cups cooked short grain rice
-
1/2 tsp salt
-
5.29 oz canned tuna (in oil recommended, or canned tuna in water)
-
2 tbsp Japanese mayo (or regular mayonnaise)
-
2 sheets nori (or use 1/2 sheet if you prefer less)
-
1 tsp sesame seeds (for garnishing, optional)
Instructions
-
Step 1
In a bowl, combine the cooked rice and salt. Mix well. -
Step 2
Drain the canned tuna well and flake it into a separate bowl. Mix with the mayonnaise until well combined. -
Step 3
Wet your hands with water to prevent sticking. Take a portion of the rice (about 1/3 cup) and flatten it slightly in your palm. -
Step 4
Place a spoonful of the tuna-mayo mixture in the center of the flattened rice. -
Step 5
Carefully fold the rice around the filling, shaping it into a triangle or a ball. Gently press to compact the rice. -
Step 6
Cut the nori sheets into desired shapes for wrapping or decorating the onigiri. -
Step 7
Wrap the onigiri with nori. If using sesame seeds, sprinkle them on top for garnish.
Important Information
Nutrition Facts (Per Serving)
It is important to consider this information as approximate and not to use it as definitive health advice.
Allergy Information
Please check ingredients for potential allergens and consult a health professional if in doubt.