Chocolate Dipped Fruit Cones Delightful Treat
Chocolate Dipped Fruit Filled Cones are more than just a sweet treat; they’re a nostalgic journey to summer days and carefree moments. Imagin extracte the satisfying crunch of a perfectly baked cone giving way to a burst of luscious, fresh fruit, all enveloped in a glossy, decadent shell of rich chocolate. It’s that delightful interplay of textures and flavors that makes these chocolate dipped fruit filled cones so utterly irresistible. We all crave that perfect bite that combines crisp, creamy, and fruity, and this recipe delivers it in spades. What truly sets these apart is the customizable nature; you can fill them with your favorite seasonal fruits, from juicy strawberries and tart raspberries to sweet mango or tangy pineapple. Then, the magic happens as you dip them in your choice of chocolate, creating a beautiful, edible masterpiece that’s as fun to make as it is to devour. Get ready to impress yourself and everyone lucky enough to share these delightful chocolate dipped fruit filled cones!

Ingredients:
Let’s Make Some Delicious Chocolate Dipped Fruit Filled Cones!
There’s something incredibly charming and utterly delicious about a dessert that combines the crisp sweetness of a sugar cone with the rich decadence of chocolate and the bright, refreshing burst of fresh fruit. These Chocolate Dipped Fruit Filled Cones are a delightful treat that are surprisingly easy to make, perfect for parties, a special dessert, or even just a fun afternoon project. The combination of textures and flavors is simply irresistible, and you can customize the fruit to your heart’s content! Imagin extracte biting into that crunchy cone, followed by smooth, melted chocolate, and then the juicy sweetness of ripe berries or tropical fruits. It’s pure joy in every bite!
Preparing Your Cones and Fruit
First things first, let’s get our ingredients ready. We want everything to be prepped and waiting so we can move efficiently once the chocolate is melted.
Fruit Preparation:
Start by washing all your fresh fruits thoroughly under cool running water. Gently pat them dry with paper towels. This is an important step, especially for berries, as excess moisture can affect the chocolate’s texture. For the strawberries, remove the green leafy tops (hull them) and then slice them into bite-sized pieces. If your raspberries are particularly delicate, handle them with extra care. For the mango and pineapple, peel them and then chop them into small, manageable cubes, similar in size to your berries. Having all your fruit prepped and ready in separate bowls means you can easily scoop them into your cones without any fuss.
Melting the Chocolate
This is where the magic happens! Melting chocolate properly is key to achieving a smooth, glossy coating.
The Double Boiler Method:
I find the double boiler method to be the most reliable way to melt chocolate without scorching it. Grab a saucepan and fill it with about an inch or two of water. Place a heatproof bowl (glass or stainless steel works best) over the saucepan, making sure the bottom of the bowl doesn’t touch the water. Bring the water to a gentle simmer over medium-low heat. Add your chocolate chips to the bowl. Stir them frequently with a heatproof spatula or spoon. You’ll see them start to soften and melt. Once most of the chocolate has melted, add the coconut oil or vegetable shortening. This little bit of fat is crucial for making the chocolate extra smooth and shiny, and it helps it set up nicely without being too brittle. Continue stirring until the chocolate is completely smooth and all the chips are melted. Remove the bowl from the heat and set it aside to cool slightly, just enough so it’s not piping hot but still liquid.
Assembling Your Delicious Cones
Now for the fun part – filling and dipping!
Filling the Cones:
Take your sugar cones and place them upright on a baking sheet lined with parchment paper. This will make it easy to move them around and catch any drips. You want to start by filling the bottom of each cone with a small amount of your chosen fruit. Think of this as the base layer. I like to put a few berries or some mango in the bottom. Don’t overfill them at this stage, as you still need room for more fruit and the chocolate coating.
Adding More Fruit and Dipping:
Now, carefully spoon more of your mixed fruit into the cones, filling them up to just below the rim. Try to get a nice mix of different fruits in each cone. Once your cones are filled, it’s time for the chocolate dip! Hold a filled cone over the bowl of slightly cooled melted chocolate. Gently dip the top portion of the cone into the chocolate, allowing it to coat the sides. You can spoon more chocolate over the top if you prefer a thicker coating. If you’re using sprinkles, chopped nuts, or shredded coconut, now is the time to sprinkle them over the wet chocolate! Work quickly but carefully to avoid dropping the cone. Place the dipped cone back onto the parchment-lined baking sheet.
Setting and Enjoying
All that’s left is to let them set and then enjoy your magnificent creations!
Allowing Them to Set:
Once all your cones are filled and dipped, place the baking sheet in the refrigerator for at least 15-20 minutes, or until the chocolate is firm and set. This ensures your delicious fruit filling stays contained and the chocolate coating is perfectly crisp. You can also let them set at room temperature if your kitchen isn’t too warm, but refrigeration guarantees a quicker and firmer set. Once they’re fully set, your Chocolate Dipped Fruit Filled Cones are ready to be devoured! They are best enjoyed the same day they are made for the freshest fruit and crispiest cone, but they can be stored in an airtight container in the refrigerator for a day or two. Enjoy every sweet, fruity, chocolatey bite!
Conclusion:
I hope you’ve enjoyed learning how to make these delightful Chocolate Dipped Fruit Filled Cones! This recipe truly is a winner because it offers a perfect balance of textures and flavors – the crisp waffle cone, the creamy, sweet filling, and the rich, decadent chocolate coating. It’s a fantastic treat that feels both elegant and incredibly fun to eat, making it suitable for any occasion, from a casual afternoon pick-me-up to a special celebration.
These cones are incredibly versatile! For serving suggestions, imagin extracte them as a beautiful dessert centerpiece at a summer barbecue, a delightful addition to a dessert buffet, or simply as a special homemade gift for a loved one. You can also get creative with variations. Try different fruit fillings like a vibrant raspberry mousse, a zesty lemon curd, or even a smooth chocolate ganache for an extra chocolatey experience. Consider adding a sprinkle of chopped nuts, toasted coconut flakes, or a drizzle of white chocolate for added visual appeal and flavor complexity. I really encourage you to give these Chocolate Dipped Fruit Filled Cones a try – they are surprisingly easy to make and the results are incredibly rewarding!
Frequently Asked Questions:
Can I make these cones ahead of time?
Yes, absolutely! You can prepare the fruit filling and dip the cones in chocolate a day in advance. Store them in an airtight container in the refrigerator. It’s best to add the fresh fruit component closer to serving time to maintain its freshness and texture.
What’s the best way to store leftover dipped cones?
Store any leftover Chocolate Dipped Fruit Filled Cones in an airtight container in the refrigerator. The chocolate might become a little harder when chilled, but it will soften nicely at room temperature for a short period before serving.
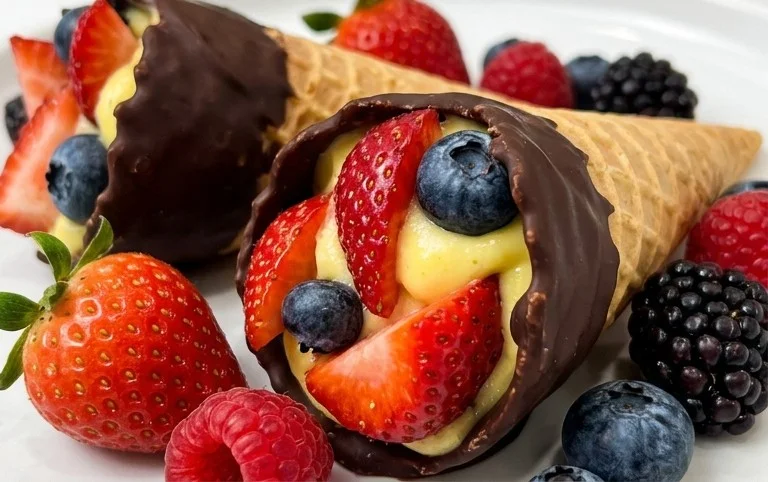
Chocolate Dipped Fruit Filled Cones
Delightful cones filled with fresh fruit and dipped in rich chocolate for a sweet and refreshing treat.
Ingredients
-
1 cup fresh strawberries
-
1 cup fresh raspberries
-
1 cup fresh blueberries
-
1 cup confectioners’ sugar
-
1/2 cup unsalted butter
-
1 teaspoon vanilla extract
-
1/4 cup milk
-
1 cup semi-sweet chocolate chips
-
1 tablespoon vegetable oil
-
4 sugar cones
Instructions
-
Step 1
Wash and hull the strawberries. If large, slice them in half. Set aside raspberries and blueberries. -
Step 2
In a medium bowl, cream together the confectioners’ sugar and unsalted butter until light and fluffy. Beat in the vanilla extract and milk until well combined. -
Step 3
Gently fold in the prepared strawberries, raspberries, and blueberries into the creamed mixture. -
Step 4
In a microwave-safe bowl, combine the semi-sweet chocolate chips and vegetable oil. Microwave in 30-second intervals, stirring after each, until melted and smooth. -
Step 5
Spoon the fruit mixture into the sugar cones, filling them about three-quarters of the way full. -
Step 6
Holding the cones by the tip, carefully dip the tops of the filled cones into the melted chocolate, allowing excess to drip off. -
Step 7
Place the chocolate-dipped cones on a parchment-lined baking sheet and refrigerate for at least 30 minutes, or until the chocolate has set.
Important Information
Nutrition Facts (Per Serving)
It is important to consider this information as approximate and not to use it as definitive health advice.
Allergy Information
Please check ingredients for potential allergens and consult a health professional if in doubt.