Red White Blue Cheesecake Strawberries Recipe
Red, White, and Blue Cheesecake Strawberries are the absolute star of any summer gathering, and I’m so excited to share this vibrant and utterly delicious recipe with you! Imagin extracte plump, juicy strawberries bursting with creamy, tangy cheesecake filling, all crowned with a patriotic flourish. These aren’t just any dessert; they’re a celebration in edible form, perfect for barbecues, picnics, or even just a special treat to brighten your day. What’s not to love about the sweet simplicity of fresh fruit paired with decadent cheesecake? The magic of these Red, White, and Blue Cheesecake Strawberries lies in their effortless elegance and the delightful textural contrast. They’re incredibly easy to make, yet they look and taste like they came straight from a gourmet bakery. Get ready to impress your friends and family with these show-stopping, flavor-packed delights!
Red, White, and Blue Cheesecake Strawberries: A Patriotic Delight
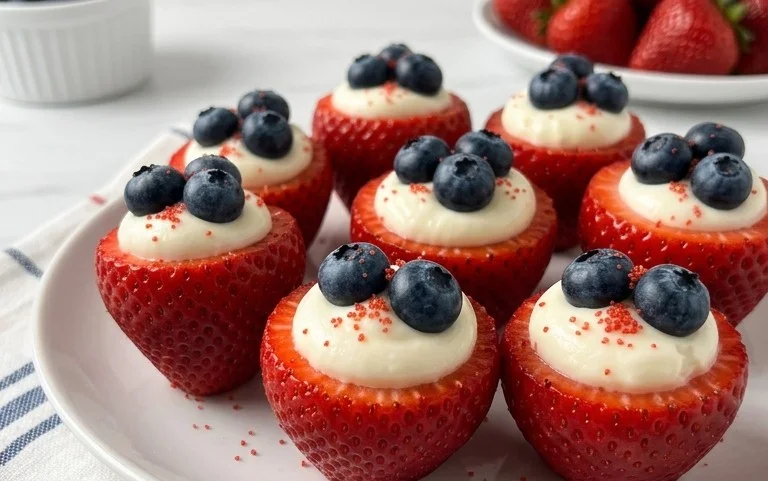
Get ready to impress your friends and family with these absolutely stunning and incredibly delicious Red, White, and Blue Cheesecake Strawberries! Perfect for your next summer gathering, a patriotic celebration, or just when you’re craving a sweet treat that’s both beautiful and bursting with flavor. These little gems combine the tangy sweetness of fresh strawberries, the creamy richness of cheesecake filling, and the vibrant pop of blueberries. They’re surprisingly easy to make, and the visual appeal is simply undeniable. Imagin extracte a platter filled with these vibrant delights – a true showstopper!
Ingredients:
Preparing Your Cheesecake Filling
The heart of this recipe is the luscious cheesecake filling. It’s designed to be light, airy, and perfectly sweet, complementing the fresh fruit beautifully. Making it is a straightforward process, but ensuring your cream cheese is truly softened is key to a smooth and lump-free filling. Leave it on the counter for at least an hour, or gently warm it in the microwave for a few seconds at a time, being careful not to melt it. This will make it much easier to incorporate with the other ingredients.
In a medium bowl, beat together the softened cream cheese and the confectioners’ sugar. You want to achieve a perfectly smooth consistency here. Using an electric mixer (handheld or stand mixer) is highly recommended for this step. Start on a low speed to avoid a cloud of powdered sugar, then gradually increase the speed until the mixture is light and fluffy. Scrape down the sides of the bowl a few times to ensure everything is well combined. This forms the creamy base of our cheesecake filling.
Next, we’ll gently fold in the thawed whipped topping. It’s important that the whipped topping is fully thawed but not watery. If it’s too liquidy, your filling might be too loose. Fold it in using a spatula, rather than beating it vigorously. We want to maintain the airiness of the whipped topping to keep our filling light and fluffy. Once the whipped topping is just incorporated, add the almond extract. The almond extract adds a subtle, sophisticated flavor that pairs wonderfully with both strawberries and cream cheese. Give it a final gentle stir to distribute the extract evenly. Don’t overmix at this stage; we’re just combining everything until no streaks of whipped topping remain.
Assembling Your Red, White, and Blue Masterpieces
Now for the fun part: assembling these patriotic treats! Start with your prepared strawberries. Ensure they are washed, dried thoroughly, and then cut in half lengthwise. You want a good, flat surface on the cut side of the strawberry to hold the cheesecake filling. Patting them dry is important; excess moisture can make the filling slide off.
Using a small spoon or a piping bag fitted with a plain tip, generously fill the hollowed-out part of each strawberry half with the cheesecake mixture. You want a nice dollop of filling, making sure it’s mounded slightly so it looks appealing. Aim for consistency so your berries look uniform when arranged. If you’re using a piping bag, it will give you a very neat and professional look, but a spoon works perfectly well too and is perhaps even more rustic and charming.
Once each strawberry half is filled, it’s time for the blueberries. Gently place one blueberry on top of the cheesecake filling on each strawberry half. This is where the “blue” in our Red, White, and Blue comes in. The vibrant blue of the blueberry against the white cheesecake and red strawberry is visually striking. Be gentle when placing the blueberries to avoid squishing them into the filling.
Chilling and Serving Your Festive Berries
To allow the flavors to meld and the cheesecake filling to set up slightly, it’s best to chill these delightful treats before serving. Arrange the filled strawberry halves on a serving platter or a baking sheet lined with parchment paper. Parchment paper makes for easy cleanup. Place the platter in the refrigerator for at least 30 minutes. This chilling time is crucial for achieving the best texture and taste. It allows the cream cheese to firm up just enough, making them easy to handle and eat.
These Red, White, and Blue Cheesecake Strawberries are best enjoyed fresh, but they can be stored in an airtight container in the refrigerator for a day. The strawberries might release some juice over time, so if you plan to make them ahead, consider adding the blueberries just before serving for maximum visual impact. They are a perfect addition to any picnic, barbecue, or dessert table, and are sure to be a hit with guests of all ages. Enjoy this simple yet elegant dessert that truly captures the spirit of celebration!

Conclusion:
These Red, White, and Blue Cheesecake Strawberries are truly a showstopper, perfect for any patriotic celebration or just a delightful summer treat! The combination of creamy, no-bake cheesecake filling nestled within juicy strawberries, topped with a burst of vibrant colors, makes for an elegant yet incredibly simple dessert. I love how they look, and the taste is even better – a refreshing sweetness from the strawberries balanced by the smooth, slightly tangy cheesecake. They’re impressive enough for a party but easy enough for a weeknight indulgence.
For serving, these beauties are fantastic on their own, allowing their natural flavors to shine. You can also arrange them on a platter for a stunning dessert spread, perhaps alongside other summer fruit or a light beverage. If you’re feeling adventurous, consider a drizzle of white chocolate or a sprinkle of edible glitter for an extra touch of sparkle. For variations, try incorporating a hint of lemon zest into the cheesecake filling for a brighter flavor, or experiment with different colored drizzles like a raspberry coulis for a deeper red hue. I genuinely encourage you to give this recipe a try; you’ll be so pleased with the delicious results!
Frequently Asked Questions:
How do I store leftover Red, White, and Blue Cheesecake Strawberries?
You can store any leftovers in an airtight container in the refrigerator for up to 2 days. It’s best to keep them chilled to maintain the cheesecake filling’s texture and the freshness of the strawberries.
Can I make the cheesecake filling ahead of time?
Yes, absolutely! The cheesecake filling can be prepared a day in advance. Cover it tightly and refrigerate. Then, simply hull and stuff the strawberries just before you plan to serve them for the best presentation and taste.
Red, White, and Blue Cheesecake Strawberries
A patriotic and no-bake dessert featuring cream cheese filling and fresh berries.
Ingredients
-
1 (8-ounce) package cream cheese, softened
-
1/2 cup confectioners’ sugar
-
1 cup whipped topping, thawed
-
1/2 teaspoon almond extract
-
12 large strawberries, cut in half
-
36 blueberries
Instructions
-
Step 1
In a medium bowl, beat the softened cream cheese and confectioners’ sugar until smooth. -
Step 2
Gently fold in the thawed whipped topping and almond extract until well combined. -
Step 3
Spoon or pipe the cream cheese mixture into the hollowed-out halves of the strawberries. -
Step 4
Arrange the filled strawberry halves on a serving platter. -
Step 5
Top each filled strawberry with a few blueberries, creating a red, white, and blue design. -
Step 6
Chill for at least 30 minutes before serving.
Important Information
Nutrition Facts (Per Serving)
It is important to consider this information as approximate and not to use it as definitive health advice.
Allergy Information
Please check ingredients for potential allergens and consult a health professional if in doubt.